twin star electric fireplace manual
Twin Star Electric Fireplace Manual: A Comprehensive Guide
This manual provides detailed instructions for safe operation‚ installation‚ and maintenance of your Twin Star electric fireplace‚ ensuring optimal performance and longevity.
Understanding Your Twin Star Fireplace
Your Twin Star electric fireplace is designed to provide supplemental zone heating and a realistic flame effect‚ enhancing the ambiance of any room. It operates using standard household electrical power and doesn’t require venting‚ making installation straightforward. Understanding the features – flame brightness adjustment‚ heat output levels‚ and thermostat control – is key to maximizing enjoyment.
These fireplaces utilize LED technology for the flame effect‚ offering energy efficiency and a long lifespan. The heating element provides consistent warmth‚ adjustable to your comfort level. Familiarizing yourself with the unit’s capabilities‚ as detailed in this manual‚ will ensure safe and effective use‚ allowing you to fully appreciate its aesthetic and functional benefits.
Safety Precautions & Warnings
To ensure safe operation‚ always adhere to these precautions. Never operate the fireplace with a damaged cord or plug‚ and avoid using extension cords. Keep flammable materials at least three feet away from the unit‚ both in front and on the sides. Do not operate if the heater is malfunctioning or has been damaged in any way.
Unplug the fireplace before cleaning or performing any maintenance. This appliance is intended for indoor use only and should not be exposed to moisture. Supervise children and pets when the fireplace is in operation. Failure to follow these warnings could result in fire‚ electric shock‚ or personal injury.
Component Identification
Familiarize yourself with the key components of your Twin Star fireplace. This includes the main fireplace unit‚ featuring the viewing area and flame effect display. You’ll also find the control panel‚ typically located on the front or side‚ for manual operation. A remote control is included for convenient adjustments from a distance.
Some models may have a separate heater unit and adjustable thermostat. Identify the power cord and ensure it’s compatible with your electrical outlet. Understanding each component will aid in proper setup‚ operation‚ and troubleshooting. Refer to the diagrams for visual assistance.
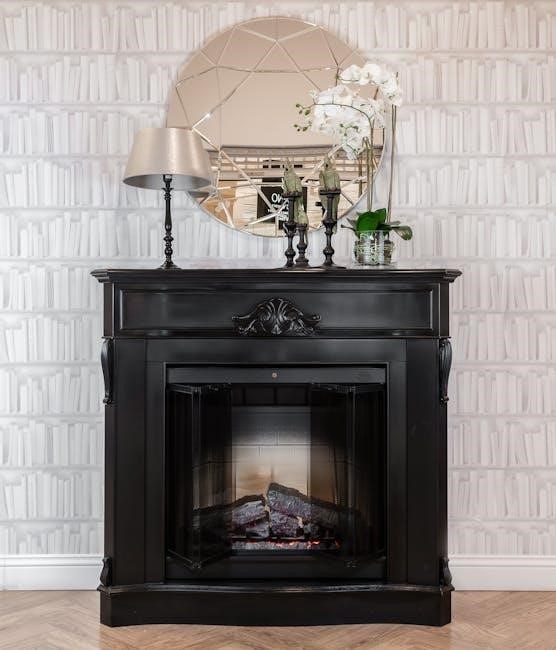
Fireplace Unit Overview
The Twin Star fireplace unit houses the core components responsible for creating the realistic flame effect and providing supplemental heat. It features a durable cabinet construction‚ designed to mimic traditional fireplace aesthetics. Inside‚ you’ll find the LED lighting system that projects the flames onto the screen or log set;
The unit also contains the heater‚ controlled by a thermostat‚ and the speaker for any crackling sound effects. Proper ventilation is crucial; ensure the unit isn’t obstructed. Inspect the viewing area for any damage before use‚ and familiarize yourself with the location of the control panel.
Remote Control Features
Your Twin Star fireplace remote offers convenient control over all functions. Key features include power on/off‚ flame effect adjustment with multiple brightness levels‚ and independent heater control. The thermostat adjustment allows precise temperature settings for comfortable heating.
Many remotes include preset flame patterns and sound options. Some models feature a timer function for automated operation. Ensure the remote has fresh batteries for optimal performance. If pairing is required‚ refer to the “Remote Control Pairing & Issues” section. Keep the remote clean and dry to prevent malfunctions.
Initial Setup & Installation
Before operating your Twin Star fireplace‚ careful setup is crucial. Begin by unpacking all components and inspecting for any shipping damage. Retain the original packaging for potential returns or warranty claims. Choose a location that meets the “Placement Considerations” outlined in this manual‚ ensuring adequate ventilation and proximity to a grounded electrical outlet.
Avoid placing the fireplace near flammable materials or in high-humidity areas. Securely position the unit on a level surface. Do not obstruct the heater vents. Follow all local electrical codes during installation. Improper installation may void the warranty.
Unpacking and Inspection
Carefully unpack your Twin Star electric fireplace from its packaging‚ taking care not to damage the unit or its components. Inventory all parts against the included parts list to ensure everything is present. Inspect the fireplace for any visible signs of damage incurred during shipping‚ such as dents‚ scratches‚ or broken parts.
If any damage is detected‚ immediately contact Twin Star Customer Service and do not attempt to operate the fireplace. Retain all packaging materials as they may be required for a damage claim. Document any damage with photographs for your records. Proper inspection prevents potential safety hazards.
Placement Considerations
When selecting a location for your Twin Star electric fireplace‚ prioritize safety and functionality. Ensure adequate clearance around the unit – at least 6 inches on all sides – to allow for proper ventilation and prevent overheating. Avoid placing the fireplace near flammable materials like curtains‚ furniture‚ or paper products.
Position the fireplace on a level‚ stable surface to prevent tipping. Consider proximity to a power outlet; extension cords should be avoided if possible. Ensure the viewing area isn’t obstructed and that the fireplace is visible from desired seating positions. Proper placement enhances both safety and enjoyment.

Operating Instructions
Your Twin Star electric fireplace is designed for ease of use. Before initial operation‚ ensure the unit is properly installed and connected to a grounded outlet. To power on‚ locate the power switch‚ typically found on the unit itself or via the remote control. The remote offers convenient control over all functions.
Experiment with flame effect settings to achieve your desired ambiance. Adjust heat settings using the remote or onboard controls‚ and utilize the thermostat to maintain a consistent temperature. Regularly check the power cord and outlet for any signs of damage.
Powering On/Off
To activate your Twin Star electric fireplace‚ locate the primary power switch‚ usually situated on the unit’s rear or side panel. Ensure this switch is in the “On” position. Subsequently‚ use the remote control or the front panel controls to initiate fireplace operation. Pressing the power button on either will activate the unit.
For complete shutdown‚ repeat the process – press the power button on the remote or front panel. Always switch off the main power switch when the fireplace is not in use for extended periods‚ enhancing safety and conserving energy.
Flame Effect Control
Twin Star fireplaces offer adjustable flame effects for customized ambiance. Utilize the remote control or front panel buttons designated for flame control. Typically‚ a “Flame Color” button cycles through available hues‚ while a “Flame Speed” button adjusts the flickering intensity. Experiment with these settings to achieve your desired visual experience.
Some models feature brightness control‚ allowing you to dim or brighten the flame projection. Independent flame operation is often possible – enjoy the visual warmth without activating the heater. Refer to your specific model’s diagram for precise button locations.

Heat Settings & Thermostat
Twin Star fireplaces generally offer multiple heat settings‚ often “Low” and “High‚” controlled via the remote or front panel. Pressing the “Heat” button typically cycles through these options. Many models include a thermostat function for maintaining a consistent room temperature; Activate the thermostat by setting your desired temperature using the “Temp Up” and “Temp Down” buttons.
The fireplace will automatically cycle on and off to maintain the set temperature. Ensure proper airflow around the unit for accurate temperature sensing. Some models offer an “Auto” mode‚ combining flame effects and thermostat control for efficient heating.
Maintenance & Cleaning
Regular maintenance ensures your Twin Star fireplace operates safely and efficiently. Always disconnect power before cleaning. Weekly dusting with a soft‚ dry cloth prevents dust buildup on the unit’s exterior and internal components. The viewing area (glass or acrylic) should be cleaned periodically with a glass cleaner specifically designed for fireplace use – avoid abrasive cleaners.
If your model has a filter‚ check and clean or replace it as needed (refer to the “Filter Maintenance” section). Inspect the power cord for damage regularly. Proper care extends the life of your fireplace and maintains its aesthetic appeal.
Regular Dusting
Consistent dusting is crucial for maintaining your Twin Star electric fireplace’s performance and appearance. Use a soft‚ dry cloth to gently wipe down all exterior surfaces – the casing‚ surrounding trim‚ and the area around the flame display. Weekly dusting prevents the accumulation of dust‚ which can impede airflow and potentially affect the heating element’s efficiency.
Pay close attention to vents and crevices where dust tends to gather. Avoid using liquids or abrasive cleaners‚ as these can damage the finish. A simple‚ dry dusting routine will keep your fireplace looking its best and functioning optimally for years to come.
Cleaning the Viewing Area
Maintaining a clear viewing area is essential for enjoying the realistic flame effect of your Twin Star electric fireplace. Always ensure the fireplace is completely powered off and cooled down before cleaning. Use a specialized glass cleaner formulated for fireplaces or a mild solution of warm water and vinegar.
Apply the cleaner to a soft cloth – never spray directly onto the glass. Gently wipe the glass surface‚ removing any smudges or residue. Avoid abrasive cleaners or scrub brushes‚ as these can scratch the glass. Dry with a clean‚ lint-free cloth for a sparkling‚ unobstructed view of the flames.

Filter Maintenance (if applicable)
Some Twin Star electric fireplace models include an air filter to help maintain air quality. If your unit has a filter‚ it requires periodic cleaning or replacement for optimal performance. Refer to your specific model’s diagrams to locate the filter access panel – typically found at the rear or base of the fireplace.
Remove the filter and inspect it. If it’s dusty‚ gently vacuum it with a brush attachment. Replace the filter if it’s heavily soiled or damaged. The frequency of filter maintenance depends on usage and environmental conditions; check monthly during peak seasons. Reinstall the clean or new filter securely.
Troubleshooting Common Issues
Encountering problems with your Twin Star fireplace? This section addresses frequent concerns. If the fireplace doesn’t power on‚ verify the power cord is securely plugged into a working outlet and the switch is on. For flame effect malfunctions‚ ensure the settings are correctly adjusted using the remote. If the heater isn’t working‚ confirm the heat function is activated and the thermostat is set to a desired temperature.
If issues persist‚ consult the error code section or contact Twin Star customer support. Never attempt to disassemble or repair the unit yourself – this could void the warranty and pose a safety risk.
Fireplace Not Turning On
If your Twin Star fireplace fails to power on‚ begin with the simplest checks. First‚ ensure the power cord is firmly connected to a functioning electrical outlet. Test the outlet with another device to confirm it’s supplying power. Next‚ verify the on/off switch located on the fireplace unit itself is in the ‘on’ position.
Also‚ check the remote control batteries and ensure they are fresh and correctly installed. If using a power strip‚ confirm it’s switched on and functioning correctly. If these steps don’t resolve the issue‚ consult the warranty information.
Flame Effect Malfunctions
Should the flame effect appear distorted‚ flicker erratically‚ or not illuminate at all‚ several factors could be at play. First‚ ensure the fireplace isn’t exposed to direct sunlight‚ as this can interfere with the light sensor. Next‚ try cycling through the different flame effect settings using the remote control or the unit’s control panel.
If the problem persists‚ a temporary reset might help. Unplug the fireplace for 60 seconds‚ then plug it back in. If the issue continues‚ contact Twin Star customer support for further assistance‚ potentially indicating a component malfunction.
Heater Not Working
If your Twin Star electric fireplace isn’t producing heat‚ first verify the unit is properly plugged into a functioning outlet and the power switch is on. Confirm the thermostat is set to a temperature higher than the ambient room temperature. Ensure the heater function is activated via the remote or control panel – it may have been accidentally disabled.
If these steps don’t resolve the issue‚ a thermal overload protection system might have been triggered. Unplug the fireplace and allow it to cool for an hour before attempting to restart it. If the heater still fails to operate‚ contact Twin Star support.
Remote Control Pairing & Issues
If your Twin Star fireplace remote isn’t responding‚ begin by ensuring fresh batteries are installed correctly. Attempt to re-pair the remote with the fireplace unit. Typically‚ this involves pressing and holding a “Pair” or “Connect” button on both the remote and the fireplace simultaneously for several seconds. Consult your specific model’s instructions for precise pairing procedures.
If pairing fails‚ ensure there’s no interference from other electronic devices. If issues persist‚ try resetting the fireplace by unplugging it for a minute. Contact Twin Star customer support if the remote remains unresponsive after these steps.
Understanding Error Codes
Twin Star fireplaces utilize error codes to diagnose potential issues. These codes‚ displayed on the unit’s screen (if equipped)‚ indicate specific malfunctions. Common codes might relate to heater failures‚ sensor problems‚ or communication errors between the unit and the remote control. Refer to the dedicated error code section within your fireplace’s manual for a comprehensive list and their corresponding solutions.
If an error code appears‚ attempt a simple reset by unplugging the fireplace for a few minutes. If the code persists‚ document it and contact Twin Star customer support for assistance‚ providing the specific error code for faster troubleshooting.
Warranty Information
Your Twin Star electric fireplace is covered by a limited warranty against defects in materials and workmanship. The standard warranty period is typically one year from the date of purchase‚ though extended warranties may be available. This warranty covers component failures under normal use‚ but does not extend to damage resulting from misuse‚ accidents‚ or unauthorized modifications.
To make a warranty claim‚ retain your proof of purchase and contact Twin Star customer service. Detailed warranty terms and conditions are included in a separate document packaged with your fireplace‚ or available for download on the Twin Star website.
Frequently Asked Questions (FAQ)
Q: My fireplace isn’t heating. What should I do? A: Ensure the heater is switched on and the thermostat is set to your desired temperature. Check the circuit breaker.
Q: How do I clean the viewing screen? A: Use a soft‚ damp cloth. Avoid abrasive cleaners.
Q: Can I use this fireplace without the heat? A: Yes‚ you can enjoy the flame effect independently of the heating function.
Q: How do I pair the remote? A: Refer to the ‘Remote Control Pairing & Issues’ section for detailed instructions.
Accessing Additional Support
Twin Star Customer Service is readily available to assist with any questions or concerns you may have regarding your electric fireplace. Contact them via phone or email‚ details of which are found within the warranty information section of this manual.
Online Resources & Manual Downloads offer a wealth of information. Visit the official Twin Star website to access downloadable manuals‚ troubleshooting guides‚ and frequently asked questions. Explore online forums and communities for shared experiences and solutions from other users.
Twin Star Customer Service
For direct assistance‚ Twin Star’s dedicated customer support team is your primary resource. They can address specific issues‚ clarify manual instructions‚ and guide you through troubleshooting steps. Contact options typically include a toll-free phone number and an email address‚ both readily available on the Twin Star website and within the warranty documentation.
Be prepared to provide your fireplace model number and purchase date when contacting support to expedite the assistance process. Their knowledgeable representatives are committed to ensuring your complete satisfaction with your Twin Star electric fireplace.

Online Resources & Manual Downloads
Twin Star provides a comprehensive online support portal accessible through their official website. This digital hub features a searchable knowledge base‚ frequently asked questions (FAQs)‚ and downloadable versions of all Twin Star electric fireplace manuals. You can easily find your specific model’s manual by entering the model number into the search bar.
Beyond the manuals‚ the website often includes helpful videos demonstrating installation‚ operation‚ and basic maintenance procedures. These resources are available 24/7‚ offering convenient self-service support whenever you need it.
Bing Related Searches: Finding More Information
Bing’s related searches feature offers a powerful way to expand your understanding of Twin Star electric fireplaces and troubleshoot potential issues. After an initial search‚ Bing displays suggestions like “Twin Star fireplace troubleshooting‚” “electric fireplace heater not working‚” or “Twin Star remote control pairing.”
These related queries reflect common user concerns and can lead you to relevant forum discussions‚ customer reviews‚ and alternative solutions not immediately apparent. Microsoft is actively testing sticky and zoomable related searches‚ enhancing discovery. Utilizing these suggestions broadens your research beyond the first page of results.
Bing Search API & Related Searches

Developers can access Bing’s related search data through the Bing Search API‚ utilizing the ‘RelatedSearches’ response filter. This allows integration of suggested queries directly into applications‚ enhancing user experience. However‚ implementing this requires careful consideration of API usage and rate limits.
The API provides a structured way to retrieve these suggestions programmatically‚ going beyond simple keyword analysis. Understanding how Bing generates these related searches – based on user behavior and search patterns – is crucial for effective SEO and content strategy related to Twin Star fireplaces. Preview versions offer improved search and responses.