Archive: July 19, 2024

PDF

civil engineering filetype:pdf

Civil engineering is the branch of engineering that designs, constructs, and maintains infrastructure, aiming to improve living conditions through innovative solutions for roads, bridges, buildings, and water systems.

1.1 Definition and Scope

Civil engineering is the professional practice of designing, constructing, and maintaining infrastructure and public or private facilities. It encompasses a wide range of activities, including planning, surveying, and managing projects related to transportation, buildings, and water systems. The scope includes both public works, such as roads and bridges, and private developments, like commercial buildings and residential communities. It combines technical knowledge with creativity to solve practical problems and improve the quality of life sustainably and ethically.

1.2 Importance of Civil Engineering

Civil engineering plays a vital role in shaping modern society by creating and maintaining the physical infrastructure that supports daily life. It ensures the safety, functionality, and sustainability of structures like roads, bridges, and buildings. Civil engineers address critical challenges such as water supply, waste management, and disaster resilience, directly impacting public health and economic development. Their work lays the foundation for community growth, connecting people and facilitating economic activities while protecting the environment for future generations.

History of Civil Engineering

Civil engineering traces its roots to ancient civilizations, with early advancements in construction, water systems, and transportation. It evolved through centuries, adapting to societal needs and technological progress.

2.1 Ancient Civilizations and Early Structures

Ancient civilizations laid the foundation for civil engineering through remarkable structures like the Egyptian Pyramids, Great Wall of China, and Roman aqueducts. These early feats demonstrated advanced understanding of materials, geometry, and construction techniques. The Greeks contributed iconic buildings such as the Parthenon, while Mesopotamians developed irrigation systems. Early structures like the Hanging Gardens of Babylon and Machu Picchu highlight the ingenuity of ancient engineers in addressing societal needs and environmental challenges. These achievements influenced modern practices and remain awe-inspiring today.

2.2 Evolution Through the Ages

Civil engineering evolved significantly over centuries, adapting to technological advancements and societal needs. The medieval period saw advancements in castle construction and fortified structures. The Industrial Revolution introduced steel and iron, enabling railways, factories, and modern infrastructure. In the 20th century, reinforced concrete and computers revolutionized design and construction. Each era brought new materials, techniques, and challenges, shaping the field into its modern form while addressing growing urbanization and environmental demands.

Fields of Civil Engineering

Civil engineering encompasses diverse fields like structural, transportation, water resources, geotechnical, and environmental engineering, each focusing on improving infrastructure and enhancing societal well-being and economic growth.

3.1 Structural Engineering

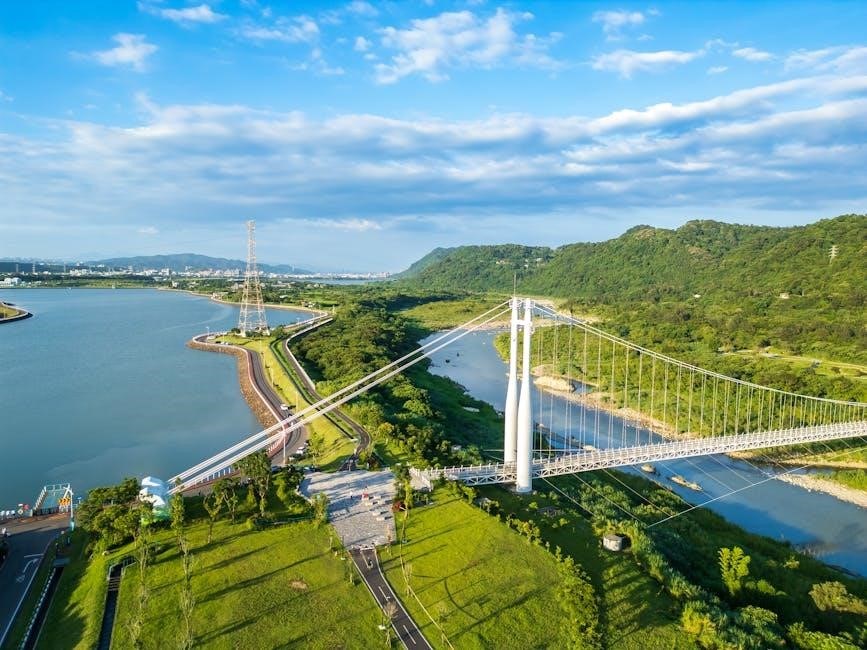
Structural engineering focuses on designing and analyzing structures like buildings, bridges, and stadiums to ensure they are safe, durable, and resistant to external forces such as wind, earthquakes, and heavy loads. Structural engineers use advanced materials and techniques to optimize stability, strength, and cost-effectiveness. They also assess existing structures for safety and perform repairs or upgrades when necessary. This field is crucial for creating resilient infrastructure that withstands natural disasters and supports urban growth effectively.

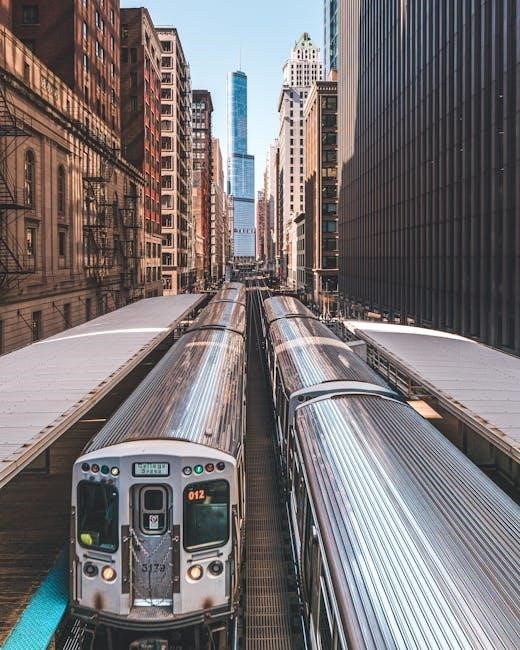
3.2 Transportation Engineering

Transportation engineering is a branch of civil engineering focused on designing and managing transportation systems, including roads, railways, airports, and public transit. It prioritizes safety, efficiency, and accessibility while reducing environmental impact. By employing intelligent transportation systems and sustainable practices, transportation engineers address the increasing need for reliable and efficient mobility solutions for both people and goods.

3.3 Water Resources Engineering

Water resources engineering focuses on managing water systems to ensure sustainable supply, treatment, and distribution. It addresses challenges like scarcity, flooding, and pollution, ensuring access to clean water and proper waste management. This field integrates hydrology, hydraulics, and environmental science to develop solutions for water conservation, irrigation, and flood control, while maintaining ecological balance and public health.

3.4 Geotechnical Engineering

Geotechnical engineering is a specialized field within civil engineering focusing on the behavior of earth materials. It involves analyzing soil, rock mechanics, and groundwater to design stable structures like foundations, tunnels, and slopes. Geotechnical engineers conduct site investigations and soil testing to ensure structural safety and prevent failures. Their work is crucial for the stability and longevity of large-scale projects, ensuring that buildings and infrastructure are built on secure ground.

3.5 Environmental Engineering

Environmental engineering is a branch of civil engineering focused on improving environmental quality and public health. It addresses challenges like air and water pollution, waste management, and climate change. Engineers design systems to treat water and sewage, manage waste sustainably, and mitigate environmental impacts. This field emphasizes sustainability, ensuring that infrastructure projects minimize harm to ecosystems and promote green technologies, while maintaining compliance with environmental regulations and standards.

Role of Civil Engineers

Civil engineers plan, design, and develop infrastructure projects, ensuring they are safe, efficient, and meet regulatory standards. They oversee construction, balancing technical requirements with societal and environmental needs.

4.1 Designing Infrastructure

Civil engineers are responsible for planning and designing infrastructure projects, such as roads, bridges, airports, and water treatment plants. They create detailed blueprints and models, ensuring structures are safe, durable, and meet functional requirements. This involves analyzing site conditions, selecting appropriate materials, and adhering to environmental and safety regulations. Their designs must balance aesthetics, functionality, and cost-effectiveness, often utilizing advanced software for precision and efficiency in the planning process.

4.2 Problem-Solving and Innovation

Civil engineers are adept at solving complex problems, from structural failures to environmental challenges. They innovate by developing sustainable materials, advanced construction techniques, and smart systems. By integrating technologies like BIM and IoT, they optimize designs and improve efficiency. Collaboration with other disciplines fosters creative solutions to modern issues, ensuring infrastructure adapts to evolving needs while minimizing environmental impact. Innovation drives progress, enabling civil engineers to address global challenges effectively.

Key Skills for Civil Engineers

Civil engineers require technical expertise, strong problem-solving abilities, effective communication, and excellent project management skills to design and manage infrastructure projects efficiently and safely.

5.1 Technical Knowledge

Technical knowledge is fundamental for civil engineers, encompassing understanding of materials, structural analysis, and design principles. Proficiency in mathematics and physics is essential, along with familiarity with engineering software and building codes. Civil engineers must apply theoretical knowledge to practical problems, ensuring safety and efficiency in construction. Staying updated with industry advancements and standards is crucial for delivering innovative and sustainable solutions.

5.2 Project Management

Project management is critical in civil engineering, ensuring projects are completed on time, within budget, and to required standards. Civil engineers must coordinate tasks, manage resources, and monitor progress. They use tools like CPM and PERT for scheduling and risk assessment. Effective communication with stakeholders is vital to address challenges and ensure compliance with regulations. Strong organizational and decision-making skills are essential to deliver successful projects and maintain client satisfaction while balancing technical and logistical demands.

5.3 Communication and Teamwork

Effective communication and teamwork are essential in civil engineering, where projects often involve large, multidisciplinary teams. Engineers must clearly convey ideas, coordinate tasks, and collaborate with architects, contractors, and clients. Strong interpersonal skills ensure seamless coordination, while active listening and adaptability help resolve conflicts. Communication tools, such as meetings, reports, and digital platforms, facilitate information sharing. Teamwork fosters innovation, allowing engineers to pool expertise and deliver complex projects successfully while maintaining safety and efficiency.

The Civil Engineering Design Process

The civil engineering design process involves systematic planning, analysis, and creation of detailed plans to solve engineering problems, ensuring functional, safe, and sustainable infrastructure solutions are developed.

6.1 Planning and Feasibility Studies

Planning and feasibility studies are the initial stages of the civil engineering design process. They involve assessing project viability by analyzing site conditions, costs, and environmental impacts. Engineers gather data, consult stakeholders, and evaluate technical requirements to determine if a project is practical and sustainable. Feasibility studies help identify potential risks and opportunities, ensuring resources are allocated efficiently. This phase lays the foundation for the design process, guiding decision-making and setting project objectives.

6.2 Design Analysis and Modeling

Design analysis and modeling involve the use of advanced tools to evaluate and refine engineering designs. Structural analysis, simulation software, and 3D modeling help assess factors like stress, load distribution, and material performance. This phase ensures that designs meet safety, functionality, and cost requirements. Engineers use techniques such as finite element analysis and Building Information Modeling (BIM) to optimize structures and systems. Accurate modeling enables iterative improvements, reducing risks and enhancing overall design efficiency before construction begins.

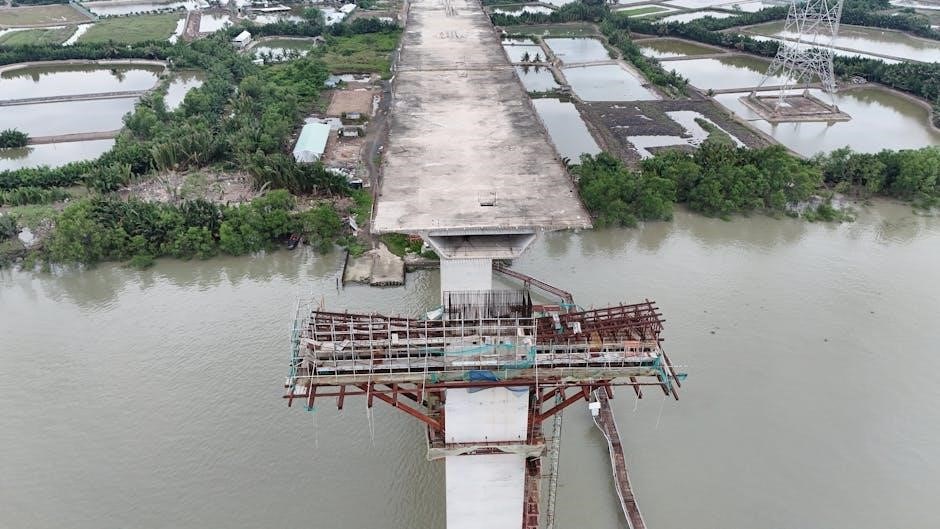
6.3 Prototyping and Testing

Prototyping and testing are crucial phases where engineers validate designs through physical or digital models. This step ensures structures or systems meet performance, safety, and functionality requirements. Prototypes are tested under simulated conditions to assess durability, stress tolerance, and environmental impact. Material strength, load capacity, and long-term reliability are evaluated. Iterative testing identifies design flaws, allowing for refinements before full-scale construction. This process enhances accuracy, reduces risks, and ensures the final product meets specified standards and expectations.

Construction Management

Construction management involves planning, executing, and monitoring projects to ensure timely completion within budget and quality standards. It encompasses site coordination, safety protocols, material logistics, and stakeholder communication.

7.1 Project Planning and Scheduling

Project planning and scheduling are critical in construction management, ensuring tasks are completed efficiently. It involves defining objectives, timelines, and budgets, while allocating resources effectively. Key steps include creating detailed schedules, assigning responsibilities, and identifying potential risks. Tools like Gantt charts and Critical Path Method (CPM) help visualize workflows and track progress. Effective planning minimizes delays, reduces costs, and ensures projects align with stakeholder expectations, laying a solid foundation for successful execution.

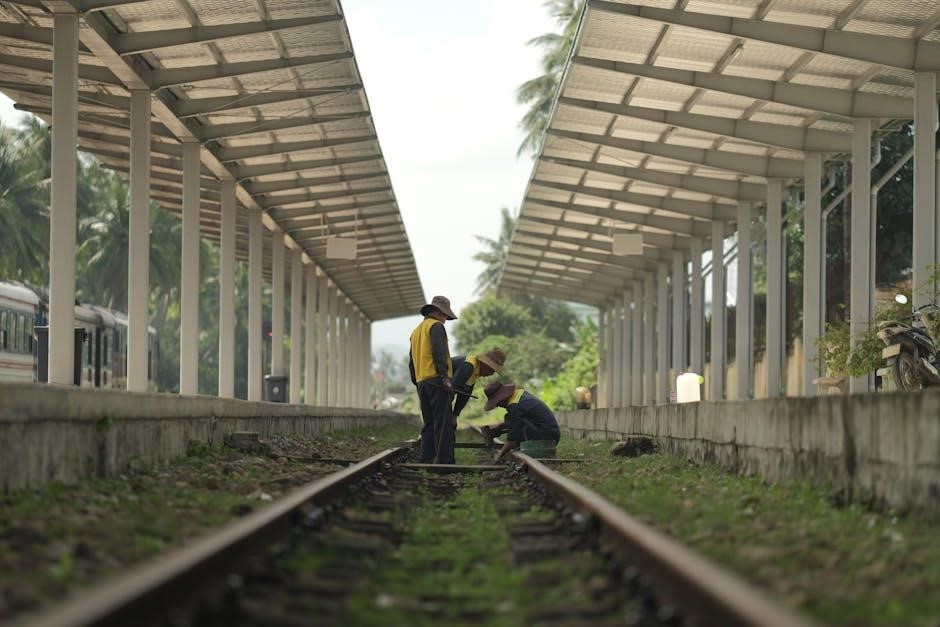
7.2 Site Management and Safety

Effective site management ensures smooth operations and adherence to safety protocols. It involves overseeing daily activities, coordinating teams, and maintaining a safe working environment. Safety measures include regular equipment inspections, hazard assessments, and compliance with regulations. Proper training, use of personal protective equipment, and emergency preparedness are essential. A well-managed site minimizes risks, prevents accidents, and fosters a culture of safety, ensuring the well-being of workers and the successful completion of projects.

7.3 Quality Control and Assurance

Quality control and assurance are critical in civil engineering to ensure materials, processes, and structures meet specified standards and regulations. This involves rigorous inspections, testing, and documentation to verify compliance with designs and codes. Effective QA systems help identify and address defects early, reducing rework and ensuring long-term durability and safety of infrastructure; By maintaining high standards, QA contributes to project success and client satisfaction, fostering trust and professionalism in the industry.

Materials and Technologies in Civil Engineering

Civil engineering relies on a wide range of materials and technologies, from traditional steel and concrete to advanced composites and digital tools, to create durable and sustainable infrastructure.

8.1 Traditional Materials (Steel, Concrete, etc.)

Traditional materials like steel and concrete are cornerstone components in civil engineering, valued for their strength, durability, and versatility. Steel is widely used in beams, frameworks, and reinforcing structures due to its high tensile strength and flexibility. Concrete, a composite of cement, water, and aggregates, is prized for its compressive strength and moldability, making it ideal for foundations, walls, and pavements. Both materials have been refined over centuries to enhance performance and longevity.

Their widespread use is attributed to availability, cost-effectiveness, and compatibility with various construction techniques. However, challenges such as environmental impact and susceptibility to degradation over time have led to ongoing research for improvement. Despite these limitations, steel and concrete remain indispensable in building modern infrastructure.

8.2 Advanced Materials and Innovations

Advanced materials in civil engineering include fiber-reinforced polymers (FRP), offering exceptional strength-to-weight ratios and corrosion resistance. Self-healing concrete, incorporating bacteria that produce calcite, repairs cracks autonomously. Recycled materials and sustainable alternatives reduce environmental impact. Smart materials like shape-memory alloys adapt to environmental changes, enhancing structural resilience. These innovations are transforming construction, enabling more durable, sustainable, and adaptive infrastructure while minimizing maintenance and environmental footprint.

Legal and Ethical Considerations

Civil engineering necessitates strict compliance with legal standards and ethical principles, ensuring projects meet regulatory requirements while minimizing harm to the environment and society effectively.

9.1 Contractual Obligations

Civil engineers must adhere to contractual obligations, ensuring projects are completed on time, within budget, and to specified standards. Contracts outline responsibilities, payment terms, and dispute resolution processes. Engineers must understand legal frameworks to avoid breaches, which can lead to financial penalties or reputational damage. Compliance with contractual terms is essential for maintaining trust and professionalism in the industry. Effective communication and documentation are critical to fulfilling these obligations successfully.

9.2 Environmental and Social Impact

Civil engineering projects must consider environmental and social impacts to minimize harm. Environmental impact assessments are conducted to reduce ecological damage, while social impact analyses address community disruption. Engineers strive to balance development with sustainability, ensuring projects align with ethical standards and promote public well-being. Community engagement and transparent communication are vital to address concerns and foster acceptance of infrastructure developments.

Sustainability in Civil Engineering

Sustainability in civil engineering focuses on creating eco-friendly infrastructure that minimizes environmental impact while ensuring long-term functionality and resource conservation for future generations.

10.1 Green Building Practices

Green building practices emphasize sustainable design, energy efficiency, and environmental responsibility. They incorporate renewable materials, reduce carbon footprints, and promote water conservation. These practices align with global standards like LEED certification, ensuring buildings are eco-friendly and resource-efficient. By integrating natural light, recycled materials, and smart technologies, green buildings minimize environmental impact while enhancing occupant health and productivity. This approach is crucial for sustainable development and long-term environmental stewardship.

10.2 Renewable Energy Integration

Rene­wable energy integration involves incorporating solar, wind, and geothermal energy into civil engineering projects. Civil engineers design systems to harness these sources, reducing reliance on fossil fuels. This includes installing solar panels on buildings, integrating wind turbines into urban landscapes, and utilizing geothermal energy for heating and cooling. By prioritizing renewable energy, engineers can significantly reduce carbon emissions and promote sustainable development, aligning with global climate goals and fostering eco-friendly infrastructure.

Challenges in Civil Engineering

Civil engineering faces challenges like rising infrastructure demand, climate change impacts, and resource constraints, requiring innovative solutions to ensure sustainable and resilient development.

11.1 Climate Change and Natural Disasters

Climate change and natural disasters pose significant challenges to civil engineering, including rising temperatures, extreme weather events, and sea-level rise. These factors threaten infrastructure stability, requiring adaptive designs and resilient materials. Engineers must address flooding, earthquakes, and storms by incorporating sustainable practices and advanced technologies to mitigate risks and protect communities. The increasing frequency of disasters demands innovative solutions to ensure infrastructure longevity and public safety in a rapidly changing environment.

11.2 Urbanization and Infrastructure Demand

Urbanization accelerates the demand for infrastructure, including housing, transportation, and utilities, while straining existing systems. Civil engineers face challenges in balancing population growth with resource efficiency. Sustainable solutions, such as green buildings and smart public transit, are critical to meet urban needs. The pressure to deliver resilient, scalable infrastructure highlights the importance of innovative planning and design to support rapidly growing cities and ensure equitable access to essential services.

Future Trends in Civil Engineering

Civil engineering is embracing digital transformation, with technologies like Building Information Modelling (BIM) and the Internet of Things (IoT) revolutionizing design, construction, and infrastructure management.

12.1 Digital Transformation and BIM

Digital transformation is reshaping civil engineering through Building Information Modelling (BIM), enabling enhanced collaboration, precision, and sustainability. By integrating 3D modelling, data analytics, and cloud computing, BIM streamlines project workflows, reducing errors and costs. Artificial intelligence (AI) and machine learning further optimize designs and predict potential issues, fostering smarter decision-making. This technological shift is driving efficiency, innovation, and sustainability in the construction industry, ensuring projects are delivered on time and within budget while meeting modern demands.

12.2 Smart Cities and IoT

Smart cities leverage the Internet of Things (IoT) to integrate technology into urban infrastructure, enhancing efficiency and sustainability. IoT-enabled sensors monitor traffic, energy, and water systems, optimizing resource allocation. Civil engineers use real-time data to design intelligent systems, reducing congestion and improving public safety. This convergence of technology and engineering creates livable, adaptive cities, addressing urban challenges and improving residents’ quality of life through innovative, data-driven solutions.

Case Studies in Civil Engineering

Case studies in civil engineering provide practical insights into iconic landmarks and complex projects, offering lessons for future innovations and real-world applications.

13.1 Iconic Structures (E.g., Burj Khalifa, Eiffel Tower)

Iconic structures like the Burj Khalifa and Eiffel Tower exemplify civil engineering excellence. The Burj Khalifa, the world’s tallest building, showcases innovative skyscraper design and structural engineering. The Eiffel Tower, an iron lattice masterpiece, highlights precision and historical significance. These landmarks demonstrate how civil engineering pushes boundaries, blending functionality with aesthetics, and leaving a lasting legacy for future generations to admire and draw inspiration from.

13.2 Disaster Recovery and Reconstruction

Disaster recovery and reconstruction are critical areas in civil engineering, focusing on restoring infrastructure and communities after natural disasters. Civil engineers assess damage, design resilient solutions, and oversee reconstruction to ensure safety and functionality. This process often involves innovative materials and techniques to withstand future disasters. Effective reconstruction not only rebuilds physical structures but also revitalizes communities, emphasizing sustainability and long-term resilience to create safer and more adaptable environments.

The Impact of Civil Engineering on Society

Civil engineering significantly influences society by creating infrastructure that enhances quality of life, supports economic growth, and connects communities, ensuring sustainable development and improved well-being for generations.

14.1 Improving Quality of Life

Civil engineering enhances daily life by providing reliable infrastructure, such as roads, bridges, and public transportation, enabling easier access to essential services and opportunities. Safe and functional buildings, including homes, schools, and hospitals, create stable environments for living and working. Additionally, water supply systems and sanitation solutions improve public health, while parks and recreational spaces promote mental well-being. Civil engineering directly contributes to a safer, more comfortable, and connected society, uplifting overall quality of life.

14.2 Economic Development and Growth

Civil engineering plays a pivotal role in driving economic development by building essential infrastructure that supports trade, commerce, and industry. Transportation networks, such as roads, railways, and ports, facilitate the movement of goods and people, reducing costs and enhancing productivity. Infrastructure projects create jobs, stimulate investment, and attract businesses, fostering economic growth. Moreover, reliable utilities and public facilities enable sustainable development, contributing to a nation’s prosperity and long-term societal progress.

Civil engineering is a cornerstone of modern society, shaping the infrastructure that supports daily life and economic progress. By addressing challenges like climate change and urbanization, the field continues to evolve, integrating sustainable practices and advanced technologies. Civil engineers remain essential in designing innovative solutions to global issues, ensuring a resilient and prosperous future for generations to come.

PDF

silent auction bid sheets pdf

Silent auction bid sheets are essential tools for organizing and managing fundraising events, providing a structured way for participants to place bids on items silently.

1.1 What Are Silent Auction Bid Sheets?

Silent auction bid sheets are documents used in fundraising events where participants write their bids for items; They typically include item descriptions, minimum bid amounts, and bidding increments. These sheets are usually printed or distributed as PDFs, allowing easy sharing and accessibility. They serve as a clear and organized method for participants to place bids, ensuring a smooth and structured bidding process during the event.

1.2 The Role of Bid Sheets in Fundraising Events

Silent auction bid sheets play a crucial role in fundraising events by simplifying the bidding process and maximizing revenue. They provide a structured format for participants to place bids, ensuring clarity and organization. Bid sheets also promote transparency, allowing attendees to easily track bidding progress. By offering pre-determined increments and clear instructions, they encourage competitive bidding while maintaining fairness. Their effectiveness lies in their ability to streamline the auction process, making them an indispensable tool for successful fundraising efforts.

Understanding Silent Auction Bid Sheets

Silent auction bid sheets are tools that facilitate organized and efficient bidding, enabling participants to submit offers on items without direct competition, promoting a calm and structured environment.

2.1 Key Components of a Bid Sheet

A bid sheet typically includes the item name, description, minimum bid amount, bid increments, and spaces for participants to write their names and bid amounts. It may also feature sponsor logos, event branding, and clear instructions to guide bidders. Optional sections might include a “buy now” price or a maximum bid option. These components ensure clarity and organization, making the bidding process straightforward and accessible for all participants at the event.

2.2 How Silent Auctions Differ from Traditional Auctions

Silent auctions differ from traditional auctions by eliminating the need for an auctioneer. Bids are submitted in writing on bid sheets rather than aloud. Unlike live auctions, silent auctions typically take place over a set period, allowing participants to review items and place bids at their own pace. This format creates a more relaxed atmosphere, encouraging broader participation. Traditional auctions, in contrast, are fast-paced and rely on verbal bidding, often creating a more competitive and intense environment among bidders.

The Importance of Silent Auction Bid Sheets

Silent auction bid sheets are crucial for organizing and managing bids efficiently, ensuring transparency, and streamlining the bidding process for a seamless and enjoyable experience.

3.1 Ensuring Transparency in Bidding

Silent auction bid sheets ensure transparency by providing clear, visible bidding increments and current bid amounts. This openness allows participants to track their bids in real-time, fostering trust and fairness. The structured format eliminates confusion, giving everyone equal opportunity to bid. Transparency also reduces disputes, as all bids are openly displayed, ensuring the process remains honest and accountable. This clarity is essential for maintaining credibility and participant confidence in the auction process.

3.2 Streamlining the Bidding Process

Silent auction bid sheets streamline the bidding process by providing a clear, organized method for participants to place bids. With predefined increments and easy-to-read formats, bid sheets eliminate confusion and simplify participation. This structure ensures bids are placed quickly and accurately, reducing delays and errors. By minimizing the need for staff intervention, bid sheets allow the auction to flow smoothly, creating a more efficient and enjoyable experience for all participants.

3.3 Enhancing Participant Engagement

Silent auction bid sheets enhance participant engagement by making the bidding process accessible and straightforward. Clear item descriptions, starting bids, and increments encourage active participation. The ability to review and update bids independently fosters a sense of control, increasing excitement and competitiveness. Visible bid sheets also create a dynamic atmosphere, as attendees can see others’ bids, prompting them to reconsider their own. This interactive nature boosts overall involvement, leading to higher bids and greater fundraising success.

Designing Effective Silent Auction Bid Sheets

Designing effective silent auction bid sheets involves focusing on clear layout, essential information, and visual appeal to enhance functionality and attract bidders, ensuring they are easy to use and professional-looking to support the event’s success.

4.1 Layout and Readability

A well-organized layout is crucial for silent auction bid sheets. Ensure item descriptions, minimum bids, and bidder information are clearly separated. Use large, legible fonts and ample spacing to enhance readability. Highlight important details like bid increments and closing times to prevent confusion. Align elements consistently to guide bidders’ eyes naturally. Avoid clutter by grouping related information together. Provide clear lines or boxes for writing bids and names. Use bold headings and contrasting colors to make key sections stand out, ensuring the sheet is easy to navigate at a glance.

4.2 Including Essential Information

Silent auction bid sheets must include essential details to ensure clarity and fairness. Clearly list the item name, description, and minimum bid amount. Specify bid increments and the auction’s closing time; Provide space for bidders to write their names, contact information, and bid amounts. Include instructions on how to place bids and payment methods. Highlight any terms, such as proxy bidding rules or item availability. Ensure all information is concise and easy to understand to avoid confusion and facilitate smooth participation.

4.3 Visual Appeal and Branding

A well-designed silent auction bid sheet enhances the overall event experience. Use high-quality images, consistent fonts, and complementary colors to create a professional look. Incorporate your organization’s logo and branding elements to maintain a cohesive theme. Ensure the design is visually appealing without overwhelming the essential information. Proper spacing and alignment contribute to readability. A polished and attractive bid sheet reflects positively on your event, encouraging participation and engagement from attendees.

Creating Silent Auction Bid Sheets

Creating silent auction bid sheets involves designing and customizing templates to meet your event’s needs, ensuring clarity, functionality, and visual appeal for effective bidding.

5.1 Choosing the Right Template

Choosing the right template for silent auction bid sheets is crucial. Opt for designs that are customizable, ensuring readability and space for essential details. Select templates that align with your event’s theme and branding. Consider functionality, such as easy-to-use bidding increments and clear item descriptions. Ensure the template is compatible with PDF formatting for seamless sharing and printing. A well-designed template enhances professionalism and participant experience, making your event more organized and visually appealing.

5.2 Customizing for Your Event

Customizing silent auction bid sheets ensures they align with your event’s unique needs and branding. Start by adding your event’s name, date, and logo. Tailor the layout to match your theme, using colors and fonts that reflect your brand. Include specific details like item descriptions, starting bids, and donor information. Ensure the sheets are user-friendly, with clear bidding instructions and ample space for participant names and bids. Personalization enhances the professional appearance and participant engagement, making your event stand out and memorable.

5.3 Printing and Preparation

Printing silent auction bid sheets requires high-quality materials to ensure readability and professionalism. Use sturdy paper or cardstock to prevent damage. Ensure all text and bid increments are clear and legible. Arrange the sheets neatly, grouping similar items together for easy navigation. Double-check for errors or omissions before printing. Finally, organize the sheets at the event venue, placing them near corresponding items to streamline the bidding process and enhance participant convenience.

Using Silent Auction Bid Sheets Effectively

Arrange bid sheets attractively, ensuring items are visible and accessible. Place pens nearby and assign staff to monitor bidding activity, addressing questions promptly to ensure smooth participation.

6.1 Setting Up the Auction Area

Arrange items attractively with corresponding bid sheets placed beside them. Ensure pens are readily available and position staff nearby to assist. Display clear signage directing participants to the auction area. Maintain good lighting for easy readability and accessibility. Organize the layout to encourage smooth traffic flow, preventing overcrowding. This setup creates a welcoming environment, fostering engagement and ease of participation for all attendees.

6.2 Managing Bids During the Event

Monitor bid sheets regularly to ensure bids are legible and properly recorded. Provide additional pens or bid sheets as needed. Keep track of the current highest bid for each item and update displays if necessary. Assign volunteers or staff to answer questions and assist bidders. Encourage participants to review bid sheets frequently to stay informed. Use a timer or announcements to signal the auction’s progress, ensuring all bidders are aware of remaining time. This approach helps maintain order and engagement throughout the event.

6.3 Closing the Auction and Announcing Winners

Once the bidding period ends, collect all bid sheets and verify the highest bids for each item. Announce winners clearly, ensuring transparency. Distribute items to winners and process payments promptly. Provide receipts for successful bids and thank participants for their support. Properly documenting the results ensures accountability and a smooth conclusion to the event. This organized approach leaves a positive impression on attendees and encourages future participation.

Silent Auction Bid Sheets in PDF Format

Silent auction bid sheets in PDF format offer a professional, easily shareable, and printable solution for organizing events, ensuring clarity and convenience for participants and organizers alike.

7.1 Benefits of Using PDFs

Using PDFs for silent auction bid sheets offers universal compatibility, ensuring they can be viewed on any device. PDFs maintain a professional appearance, enhancing your event’s credibility. They are easy to share via email or websites, making distribution effortless. PDFs also provide security, as they cannot be edited without authorization, protecting the integrity of your bid sheets. Additionally, PDFs reduce printing costs and environmental impact, making them a practical and eco-friendly choice for event organizers.

7.2 How to Create a PDF Bid Sheet

Creating a PDF bid sheet involves selecting a template or designing one from scratch using software like Adobe Acrobat or Canva. Customize the layout with your event’s branding, including logos and colors. Add essential details such as item descriptions, minimum bid amounts, and bidding increments. Use clear fonts for readability and ensure proper spacing for participant names and bids. Save the final design as a PDF to maintain its format and professional appearance across all devices.

7.3 Sharing and Distributing PDFs

Sharing and distributing PDF bid sheets is straightforward. Send them via email as attachments or links, or upload to your event website or social media. Use QR codes to direct attendees to downloadable versions. For in-person events, print the PDFs and place them beside auction items. Ensure all participants have easy access to the bid sheets to maximize engagement and bidding activity.

Tips for Maximizing Fundraising Success

Maximize fundraising success by creating excitement, ensuring clear instructions, and making the bidding process engaging and accessible to all participants.

8.1 Selecting the Right Items for Auction

Selecting the right items for your silent auction is crucial for success. Choose items that appeal to your target audience, such as exclusive experiences, luxury goods, or unique memorabilia. Ensure a mix of high-value and affordable items to cater to diverse budgets. Consider the relevance of items to your cause to create emotional connections. Additionally, include items with broad appeal to maximize participation and bidding activity, ensuring a successful and engaging event.

8.2 Promoting the Event Effectively

Promoting your silent auction event effectively is key to attracting attendees and driving participation. Develop a strategic marketing plan leveraging social media, email campaigns, and local outreach. Highlight unique auction items and sponsors to create excitement. Use eye-catching visuals and clear messaging to communicate the event’s purpose and benefits. Encourage early bidding by sharing sneak peeks of items through digital platforms. Partner with sponsors to amplify visibility and ensure widespread promotion for maximum engagement and fundraising success.

8.3 Encouraging Competitive Bidding

Encouraging competitive bidding is crucial for maximizing fundraising success. Start with low minimum bids to attract initial interest and gradually increase increments to prevent sudden jumps. Create urgency by announcing the auction’s end time and highlighting popular items. Display current high bids prominently to motivate others to outbid. Consider offering incentives, such as exclusive discounts or recognition, for top bidders. Ensure bid sheets are clear and easy to use, allowing participants to track progress effortlessly. Foster a lively atmosphere to keep engagement high and encourage friendly competition among attendees.

Common Mistakes to Avoid

Common mistakes to avoid include poorly designed bid sheets, insufficient item details, and unclear instructions, which can confuse bidders and reduce participation and fundraising success.

9.1 Poorly Designed Bid Sheets

Poorly designed bid sheets can lead to confusion and frustration among bidders. Cluttered layouts, illegible fonts, and lack of essential details make it difficult for participants to place bids effectively. Ensuring a clean, organized, and visually appealing design is crucial to enhance readability and user experience. Proper spacing, clear instructions, and prominent item information help bidders navigate the process smoothly, contributing to a successful silent auction event and increased fundraising potential.

9.2 Insufficient Information

Insufficient information on bid sheets can confuse bidders and hinder participation. Missing details like item descriptions, starting bids, or deadlines can lead to misunderstandings. Clearly stating the minimum increment, bidding rules, and item value is essential. Without this, bidders may hesitate to participate, reducing potential bids and revenue. Providing thorough and accurate information ensures transparency, builds trust, and encourages active engagement in the silent auction process.

9.3 Lack of Clear Instructions

Lack of clear instructions on bid sheets can confuse participants, leading to hesitation or missed bids. Unclear rules about bidding increments, closing times, or payment methods can frustrate attendees. Vague instructions may result in fewer bids and lower funds raised. To avoid this, ensure all guidelines are straightforward, concise, and easy to understand. Providing examples or visual aids can also help clarify the process and encourage participation. Clear instructions ensure a smooth and successful silent auction experience.

Silent auction bid sheets are crucial for successful fundraising, ensuring transparency and participant engagement while streamlining the bidding process. Properly designed and executed, they enhance event outcomes effectively.

10.1 Recap of Key Points

Silent auction bid sheets are essential for organizing and managing fundraising events, ensuring transparency and participant engagement. They streamline the bidding process, enhance event efficiency, and provide clear guidelines for participants. Key components include item descriptions, minimum bids, and bidding increments. Effective design, proper setup, and clear instructions are vital for success. Using PDF formats ensures consistency and ease of distribution. By avoiding common mistakes and encouraging competitive bidding, silent auctions can maximize fundraising potential and create a positive experience for all attendees.

10.2 Final Thoughts on Silent Auction Bid Sheets

Silent auction bid sheets are a powerful tool for enhancing fundraising events, ensuring clarity and organization. Their structured format simplifies bidding, fostering engagement and fairness. By designing them thoughtfully and using PDFs for consistency, you can maximize their impact. Avoiding common pitfalls and focusing on clear communication will help create a seamless experience. Silent auction bid sheets are not just practical but also essential for driving success and leaving a lasting impression on participants.

exemple rapport d’accident de travail pdf

A work accident report is a detailed document outlining the circumstances of a workplace incident, ensuring accountability, safety, and compliance with legal standards․

Importance of Documenting Workplace Accidents

Documenting workplace accidents ensures accountability, improves safety standards, and helps prevent future incidents․ Accurate records support legal compliance, insurance claims, and employee compensation․ Detailed reports provide insights into accident causes, enabling corrective measures like improved training or equipment upgrades․ Proper documentation also protects employers from potential disputes by establishing a clear understanding of events․ Additionally, it fosters a culture of safety, encouraging employees to report incidents without fear of reprisal․ Timely and precise reporting is essential for reducing risks and ensuring a safer work environment for all․ Employers must prioritize thorough documentation to maintain trust and accountability within the organization․

Overview of the Report Structure

A work accident report typically includes sections for employee identification, accident details like date, time, and location, a description of the incident and injuries, witness statements, and medical evaluations․ Additional sections cover the task being performed, environmental factors, equipment involved, and root cause analysis․ Preventive measures and follow-up actions are also documented, along with legal and procedural requirements․ The report ensures clarity, accuracy, and compliance with safety regulations, providing a comprehensive overview to prevent future incidents and support legal processes․ Structured and detailed, it serves as a critical tool for workplace safety and accountability․

Understanding the Work Accident Report

A work accident report is a formal document detailing the circumstances, injuries, and actions taken following a workplace incident, ensuring accountability and safety improvements․

Definition and Purpose

A work accident report is a formal document detailing workplace incidents, ensuring accountability and safety․ Its primary purpose is to record facts, injuries, and circumstances surrounding an accident, providing a clear understanding for legal, insurance, and safety improvement purposes; The report helps identify root causes, prevent future incidents, and ensure compliance with occupational safety regulations․ It typically includes employee details, incident descriptions, witness statements, and corrective actions․ By documenting these elements, the report serves as a critical tool for fostering a safer work environment and supporting affected employees effectively․

Key Elements of a Comprehensive Report

A comprehensive work accident report includes essential details such as employee identification, accident date, time, and location․ It also describes the incident, injuries sustained, and witness statements․ Medical evaluations and immediate actions taken are documented to ensure accountability․ The report outlines equipment involved, environmental factors, and root cause analysis․ Additionally, it covers preventive measures and long-term safety improvements․ Including these elements ensures clarity, accuracy, and compliance with legal requirements, making the report a valuable tool for investigations, insurance claims, and enhancing workplace safety standards․

Essential Components of a Work Accident Report

A work accident report must include employee identification, accident details, witness statements, medical evaluations, and root cause analysis to ensure clarity and accountability in investigations․

Identification of the Employee Involved

The report must include the full name, job title, and contact information of the employee involved in the accident․ This section ensures clarity and accountability by providing essential details about the individual․ It also specifies the employee’s role and tenure, helping to understand their workplace context․ Including an employee ID or badge number enhances accuracy and facilitates quick reference in company records․ This identification is crucial for ensuring the report is precise and reliable, avoiding any ambiguity about who was involved․ Accurate employee details are the foundation of a comprehensive and professional work accident report․ This section is vital for legal and procedural purposes, ensuring all parties involved are properly documented․

Details of the Accident (Date, Time, Location)

The report must include the exact date, time, and location of the accident to provide a clear understanding of when and where the incident occurred․ This information is critical for investigations and legal purposes․ The date should be formatted consistently (e․g․, MM/DD/YYYY), and the time should be precise, including AM/PM or 24-hour format․ The location should specify the building, floor, room, or area where the accident took place․ Including details like “during a night shift” or “in the production area” adds context․ Accuracy in recording these elements ensures the report is reliable and comprehensive, aiding in identifying patterns and preventing future incidents․ This section lays the foundation for understanding the accident’s circumstances․

Description of the Accident and Injuries Sustained

The report should provide a clear and detailed account of how the accident occurred, including the sequence of events and the specific actions or conditions that led to it․ Describe the nature of the injuries sustained, such as fractures, burns, or sprains, and specify which body parts were affected․ Note if the injuries were immediate or developed over time․ If the accident resulted in fatalities, this must be explicitly stated․ Include details about the immediate medical care provided, such as first aid administered on-site or emergency services called․ This section ensures a thorough understanding of the incident’s severity and its impact on the individual involved․ Clarity is essential for accurate documentation and further analysis․ Ensure all information is precise and relevant to the incident; Avoid speculation or assumptions not supported by evidence․ This section is crucial for legal, insurance, and safety improvement purposes․ It also helps identify patterns or recurring hazards in the workplace, enabling preventive measures․ By documenting the injuries and their severity, employers can assess the effectiveness of existing safety protocols and make necessary adjustments․ This detailed description forms the core of the report, providing a factual basis for subsequent investigations and actions․ It is vital to maintain objectivity and focus solely on verifiable facts related to the accident and resulting injuries․ This ensures the report’s credibility and usefulness for all stakeholders involved․ The description should be concise yet comprehensive, avoiding unnecessary jargon while ensuring all critical details are included․ This section serves as the foundation for understanding the incident’s consequences and informing future safety strategies․ Accuracy in this part of the report is paramount, as it directly impacts legal obligations, insurance claims, and workplace safety improvements․ Employers and investigators rely on this information to determine root causes and implement corrective actions․ In summary, the description of the accident and injuries sustained must be thorough, accurate, and free from bias to ensure its effectiveness in addressing the incident and preventing future occurrences․ By adhering to these principles, the report becomes a valuable tool for promoting workplace safety and accountability․ This section underscores the importance of diligent documentation in maintaining a safe and responsible work environment․ It also highlights the need for employers to prioritize employee well-being by ensuring accurate and detailed reporting of all workplace incidents․ Through this, organizations can foster a culture of safety and continuous improvement․ The detailed description of the accident and injuries sustained is a critical component of the report, enabling a comprehensive understanding of the incident and its implications․ It serves as a cornerstone for all subsequent actions, from legal compliance to safety enhancements․ As such, it must be approached with the utmost care and attention to detail․ This ensures that the report is not only a factual record but also a proactive tool for preventing future accidents and safeguarding employees․ By focusing on clarity, precision, and objectivity, the description of the accident and injuries sustained provides a solid foundation for effective incident management and workplace safety initiatives․ This section is essential for ensuring that all stakeholders have a clear and shared understanding of the incident, enabling collective efforts to improve safety standards and reduce risks․ In conclusion, the description of the accident and injuries sustained is a vital element of the work accident report, requiring careful attention to detail and a commitment to accuracy․ It plays a central role in promoting accountability, learning, and continuous improvement within the organization․ Through this, employers can demonstrate their dedication to employee safety and well-being, fostering trust and collaboration in the workplace․ Ultimately, this section serves as a testament to the importance of thorough documentation in addressing workplace incidents and preventing their recurrence․ By prioritizing clarity and precision, organizations can ensure that the report is both informative and actionable, supporting broader safety goals and legal requirements․ This approach not only benefits the individual involved but also contributes to a safer and more responsible work environment for all employees․ In summary, the description of the accident and injuries sustained is a cornerstone of effective incident reporting, enabling organizations to learn from past events and build a safer future․ It underscores the importance of transparency, accountability, and proactive measures in maintaining high safety standards․ By adhering to best practices in documentation, employers can create a culture of safety and continuous improvement, ultimately benefiting both the organization and its employees․ This section is a critical step in that process, providing the necessary insights to drive meaningful change and prevent future incidents․ Its importance cannot be overstated, as it directly impacts the ability of organizations to address workplace accidents effectively and responsibly․ Through accurate and detailed reporting, employers can take significant strides toward creating a safer and more secure work environment․ This, in turn, fosters a positive workplace culture and reinforces the organization’s commitment to the well-being of its employees․ In conclusion, the description of the accident and injuries sustained is a fundamental aspect of the work accident report, requiring careful preparation and attention to detail․ It serves as a vital tool for promoting safety, accountability, and continuous improvement, benefiting both the organization and its workforce․ By prioritizing accuracy and clarity, employers can ensure that this section fulfills its purpose effectively, supporting broader safety initiatives and legal compliance․ This approach not only addresses the immediate incident but also contributes to long-term workplace safety and employee well-being․ As such, it is an essential component of responsible and effective incident management․ The description of the accident and injuries sustained must therefore be treated with the utmost seriousness and care, ensuring that all relevant details are captured accurately and comprehensively․ This enables organizations to respond appropriately to incidents, learn from them, and implement measures to prevent their recurrence; By doing so, employers can demonstrate their commitment to safety and accountability, fostering a positive and protective work environment․ In summary, this section is a critical element of the work accident report, requiring precision, objectivity, and thoroughness․ It plays a key role in promoting workplace safety, legal compliance, and continuous improvement, ultimately benefiting the organization and its employees․ Through accurate and detailed documentation, employers can address incidents effectively, reduce risks, and create a safer workplace for all․ This underscores the importance of careful reporting and the role it plays in safeguarding employee well-being and organizational responsibility․ The description of the accident and injuries sustained is thus a cornerstone of effective incident management, enabling organizations to navigate the aftermath of an incident responsibly and proactively․ By focusing on clarity and precision, employers can ensure that this section provides a solid foundation for all subsequent actions, from investigations to safety improvements․ This approach not only supports legal and procedural requirements but also reinforces the organization’s commitment to safety and accountability․ In conclusion, the description of the accident and injuries sustained is a vital part of the work accident report, requiring meticulous attention to detail and a commitment to accuracy․ It serves as a critical tool for promoting workplace safety, enabling organizations to learn from incidents and implement measures to prevent their recurrence․ By prioritizing thorough documentation, employers can foster a culture of safety and responsibility, ultimately benefiting both the organization and its employees․ This section is essential for ensuring that incidents are addressed effectively and that the workplace remains a safe and secure environment for all․ Through accurate and detailed reporting, organizations can take significant steps toward achieving these goals, demonstrating their dedication to employee well-being and safety․ The description of the accident and injuries sustained is thus a fundamental aspect of responsible incident management, requiring careful preparation and attention to detail․ It provides the necessary insights to drive meaningful change and support broader safety initiatives, benefiting both the organization and its workforce․ By adhering to best practices in documentation, employers can ensure that this section fulfills its purpose effectively, contributing to a safer and more responsible work environment․ In summary, the description of the accident and injuries sustained is a critical component of the work accident report, requiring clarity, precision, and thoroughness․ It plays a central role in promoting workplace safety, legal compliance, and continuous improvement, ultimately benefiting the organization and its employees․ Through accurate and detailed documentation, employers can address incidents responsibly, reduce risks, and create a safer workplace for all․ This highlights the importance of careful reporting and its role in safeguarding employee well-being and organizational accountability․ The description of the accident and injuries sustained is thus a cornerstone of effective incident management, enabling organizations to respond proactively and responsibly to workplace incidents․ By focusing on clarity and precision, employers can ensure that this section provides a solid foundation for all subsequent actions, from

Witness Statements and Testimonies

Witness statements are crucial for providing an objective account of the accident․ Each witness should be identified with their name, job role, and contact information․ Their testimonies should be recorded verbatim, detailing what they saw, heard, or experienced related to the incident․ Witnesses should also indicate their location relative to the accident and any actions they took immediately after․ The supervisor or investigator must ensure statements are factual and unbiased․ If multiple witnesses provide conflicting accounts, this should be noted for further investigation․ Witness statements help reconstruct the incident accurately and identify potential contributing factors․ They are essential for understanding the sequence of events and ensuring accountability․ This section strengthens the credibility of the report and supports further analysis․ Clarity and detail in witness testimonies are vital for a comprehensive understanding of the accident․ Ensuring accuracy in these statements is critical for legal and procedural purposes․ Witness accounts provide valuable insights that may not be apparent from physical evidence alone․ They help identify root causes and prevent future incidents․ This section underscores the importance of gathering multiple perspectives to build a complete picture of the accident․ By including witness statements, the report becomes more robust and reliable, aiding in decision-making and safety improvements․ This ensures that all relevant information is considered, promoting fairness and transparency in the investigation process․ Witness testimonies are a key component of a thorough and accurate accident report, enabling organizations to address incidents responsibly and proactively․ Their inclusion is essential for maintaining accountability and fostering a safe work environment․ This section highlights the collaborative effort required to understand and resolve workplace incidents effectively․ By capturing witness statements, the report gains depth and credibility, supporting effective incident management and prevention strategies․ This approach ensures that all voices are heard and considered, leading to a more comprehensive understanding of the accident․ Witness testimonies are thus a critical element in the accident reporting process, providing invaluable insights that complement other evidence․ Their inclusion ensures that the report is balanced, accurate, and informative, supporting meaningful actions to enhance workplace safety․ This section demonstrates the importance of thorough documentation in addressing workplace incidents and preventing their recurrence․ By prioritizing witness statements, organizations can gather a complete and accurate account of events, enabling informed decision-making and continuous improvement․ This underscores the value of collaboration and transparency in maintaining a safe and responsible work environment․ In summary, witness statements and testimonies are essential for constructing a detailed and reliable accident report, ensuring that all perspectives are considered and accounted for․ Their inclusion strengthens the report’s credibility and supports effective incident management, ultimately contributing to a safer workplace for all employees․ By capturing these accounts, organizations demonstrate their commitment to accountability, transparency, and employee well-being․ This section is a vital part of the accident reporting process, enabling organizations to learn from incidents and implement measures to prevent future occurrences․ Through the inclusion of witness statements, the report becomes a comprehensive and actionable document, supporting safety improvements and legal compliance․ This approach ensures that the accident is thoroughly understood and addressed, fostering a culture of safety and responsibility within the organization․ The importance of witness testimonies cannot be overstated, as they provide critical insights that might otherwise go unrecorded․ By prioritizing their collection and inclusion, employers can ensure that the report is both accurate and informative, serving as a valuable tool for incident management and prevention․ This section highlights the collaborative nature of accident reporting, emphasizing the role of all stakeholders in promoting workplace safety․ By leveraging witness statements, organizations can gain a more complete understanding of incidents, enabling them to take proactive steps toward preventing similar events in the future․ This not only enhances safety but also reinforces the organization’s commitment to accountability and transparency․ In conclusion, witness statements and testimonies are a fundamental component of a comprehensive accident report, providing essential insights that support effective incident management and safety improvements․ Their inclusion ensures that the report is thorough, reliable, and actionable, benefiting both the organization and its employees․ By prioritizing the collection of witness accounts, employers can demonstrate their dedication to safety, accountability, and continuous improvement, fostering a positive and protective work environment․ This section underscores the importance of collaboration and detailed documentation in addressing workplace incidents and preventing their recurrence․ Through the inclusion of witness statements, organizations can build a robust and informative report that supports meaningful actions and promotes a culture of safety․ This approach ensures that all relevant information is considered, leading to a more complete understanding of the accident and its implications․ By valuing witness testimonies, employers can create a reporting process that is both comprehensive and fair, supporting the well-being of employees and the integrity of the organization․ This section is thus a critical part of the accident reporting process, enabling organizations to address incidents responsibly and proactively․ Through careful documentation of witness statements, employers can ensure that the report is accurate, reliable, and informative, providing a solid foundation for safety improvements and legal compliance․ This underscores the importance of thorough investigation and documentation in maintaining a safe and accountable workplace․ By including witness testimonies, the report becomes a valuable tool for understanding incidents and preventing future occurrences, benefiting both the organization and its employees․ In summary, witness statements and testimonies are essential for constructing a detailed and reliable accident report, ensuring that all perspectives are considered and accounted for․ Their inclusion strengthens the report’s credibility and supports effective incident management, ultimately contributing to a safer workplace for all employees․ By capturing these accounts, organizations demonstrate their commitment to accountability, transparency, and employee well-being․ This section is a vital part of the accident reporting process, enabling organizations to learn from incidents and implement measures to prevent future occurrences․ Through the inclusion of witness statements, the report becomes a comprehensive and actionable document, supporting safety improvements and legal compliance․ This approach ensures that the accident is thoroughly understood and addressed, fostering a culture of safety and responsibility within the organization․ The importance of witness testimonies cannot be overstated, as they provide critical insights that might otherwise go unrecorded․ By prioritizing their collection and inclusion, employers can ensure that the report is both accurate and informative, serving as a valuable tool for incident management and prevention․ This section highlights the collaborative nature of accident reporting, emphasizing the role of all stakeholders in promoting workplace safety․ By leveraging witness statements, organizations can gain a more complete understanding of incidents, enabling them to take proactive steps toward preventing similar events in the future․ This not only enhances safety but also reinforces the organization’s commitment to accountability and transparency․ In conclusion, witness statements and testimonies are a fundamental component of a comprehensive accident report, providing essential insights that support effective incident management and safety improvements․ Their inclusion ensures that the report is thorough, reliable, and actionable, benefiting both the organization and its employees․ By prioritizing the collection of witness accounts, employers can demonstrate their dedication to safety, accountability, and continuous improvement, fostering a positive and protective work environment․ This section underscores the importance of collaboration and detailed documentation in addressing workplace incidents and preventing their recurrence․ Through the inclusion of witness statements, organizations can build a robust and informative report that supports meaningful actions and promotes a culture of safety․ This approach ensures that all relevant information is considered, leading to a more complete understanding of the accident and its implications․ By valuing witness testimonies, employers can create a reporting process that is both comprehensive and fair, supporting the well-being of employees and the integrity of the organization․ This section is thus a critical part of the accident reporting process, enabling organizations to address incidents responsibly and proactively․ Through careful documentation of witness statements, employers can ensure that the report is accurate, reliable, and informative, providing a solid

Medical Evaluation and Immediate Actions Taken

The medical evaluation section details the immediate care provided to the injured employee․ This includes first aid administered at the scene, any medical facilities visited, and treatments received․ It should outline the nature of injuries, such as fractures, burns, or sprains, and note if hospitalization was required․ The report must document whether a medical professional cleared the employee to return to work or if further recovery time was recommended․ This section also specifies if emergency services were involved and any medications prescribed․ The goal is to ensure the employee’s health and safety while creating a record for insurance and legal purposes․ This information is critical for understanding the severity of the incident and ensuring proper follow-up care․ Immediate actions, such as calling emergency services or providing first aid, are also recorded here․ This section emphasizes the importance of prompt medical attention to prevent further harm and support recovery․ Accurate documentation ensures compliance with legal and medical standards, providing a clear record of the incident’s impact on the employee’s health․ This information is vital for insurance claims, workers’ compensation, and future medical referrals․ The report must reflect all medical steps taken to address the accident’s consequences thoroughly․ This ensures the employee receives appropriate care and that the incident is managed responsibly․ By detailing medical evaluations and actions, the report supports the employee’s well-being and facilitates a safe return to work․ This section is essential for maintaining accountability and ensuring the incident is handled with care and professionalism․ The documentation of medical responses and treatments underscores the organization’s commitment to employee health and safety․ It also serves as a reference for ongoing care and rehabilitation needs․ In summary, this section provides a comprehensive overview of the medical aspects of the accident, ensuring transparency and accountability in managing the incident’s aftermath․ The detailed documentation supports both the employee’s recovery and the organization’s legal obligations․ By including this information, the report becomes an essential tool for addressing the accident’s immediate and long-term consequences․ This section highlights the importance of a prompt and professional medical response in workplace incidents, ensuring the well-being of affected employees while upholding organizational responsibilities․ The accurate recording of medical evaluations and actions is critical for effective incident management and compliance with legal requirements․ This ensures that all necessary steps are taken to support the employee’s recovery and prevent future incidents․ The documentation of medical care also provides valuable insights for improving workplace safety and health protocols․ By prioritizing the employee’s medical needs, the organization demonstrates its commitment to a safe and supportive work environment․ This section is thus a vital part of the accident reporting process, ensuring that medical aspects are thoroughly addressed and documented․ The inclusion of this information supports accountability, transparency, and employee well-being, making it an essential component of a comprehensive accident report․ The detailed documentation of medical evaluations and immediate actions serves as a cornerstone for effective incident management and prevention․ By ensuring that all medical aspects are accurately recorded, the organization can address the incident’s consequences responsibly and proactively․ This section underscores the importance of prioritizing employee health and safety in the aftermath of an accident, providing a clear and detailed account of the medical response․ The information gathered here is invaluable for supporting the employee’s recovery, facilitating legal compliance, and improving workplace safety measures․ In summary, the medical evaluation and immediate actions taken are critical components of the accident report, ensuring that the incident is managed with care, accountability, and professionalism․ The detailed documentation of this section supports the employee’s well-being, legal requirements, and organizational safety standards, making it an essential part of the reporting process․ By including this information, the organization demonstrates its commitment to responsible incident management and employee care, fostering a culture of safety and accountability in the workplace․ This section provides a clear and comprehensive overview of the medical aspects of the accident, ensuring that all necessary steps are taken to address the incident’s impact on the employee’s health․ The accurate recording of medical evaluations and actions supports effective decision-making, legal compliance, and ongoing safety improvements․ By prioritizing the documentation of medical care, the organization ensures that the accident is handled responsibly and that the employee receives the necessary support for recovery․ This section is thus a fundamental part of the accident reporting process, providing essential information for managing the incident’s aftermath and preventing future occurrences․ The inclusion of medical evaluations and immediate actions underscores the organization’s commitment to employee well-being and safety, ensuring that all incidents are addressed with professionalism and care․ This approach supports accountability, transparency, and continuous improvement in workplace safety, benefiting both the organization and its employees․ By documenting medical responses and treatments, the report provides a valuable resource for understanding the incident’s impact and implementing measures to prevent similar events․ The detailed information in this section serves as a foundation for responsible incident management, ensuring that the organization meets its legal and ethical obligations․ In conclusion, the medical evaluation and immediate actions taken are essential components of a comprehensive accident report, providing critical insights into the incident’s impact on the employee’s health․ The accurate documentation of this information ensures accountability, supports recovery, and facilitates ongoing safety improvements, making it a vital part of the reporting process․ By prioritizing the medical aspects of the incident, the organization demonstrates its commitment to employee well-being and responsible incident management, fostering a safe and supportive work environment․ This section is thus a critical part of the accident reporting process, ensuring that the incident is handled with professionalism and care, and that all necessary steps are taken to support the employee’s recovery and prevent future incidents․ The detailed documentation of medical evaluations and actions supports effective decision-making, legal compliance, and continuous improvement in workplace safety; By including this information, the organization provides a clear and comprehensive account of the incident’s medical aspects, ensuring that the employee’s health and safety remain a top priority․ This section underscores the importance of thorough documentation in accident reporting, enabling the organization to address incidents responsibly and proactively․ The accurate recording of medical responses and treatments is essential for supporting the employee’s well-being, meeting legal requirements, and improving workplace safety measures․ By prioritizing the documentation of medical care, the organization ensures that the incident is managed with care and accountability, fostering a culture of safety and responsibility in the workplace․ This section is thus a fundamental part of the accident reporting process, providing essential information for understanding the incident’s impact and implementing measures to prevent future occurrences․ The inclusion of medical evaluations and immediate actions taken ensures that the report is comprehensive and informative, supporting effective incident management and safety improvements․ By documenting this information, the organization demonstrates its commitment to employee health and safety, ensuring that all incidents are addressed with professionalism and care․ This approach supports accountability, transparency, and continuous improvement in workplace safety, benefiting both the organization and its employees․ In summary, the medical evaluation and immediate actions taken are critical components of a thorough accident report, providing essential insights into the incident’s impact on the employee’s health․ The detailed documentation of this information ensures that the organization meets its legal and ethical obligations, supports the employee’s recovery, and implements measures to prevent future incidents․ By prioritizing the medical aspects of the incident, the organization fosters a safe and supportive work environment, demonstrating its commitment to accountability, transparency, and employee well-being․ This section is thus a vital part of the accident reporting process, ensuring that the incident is handled responsibly and that all necessary steps are taken to support the employee’s recovery and prevent similar events in the future․ The accurate recording of medical evaluations and actions serves as a cornerstone for effective incident management, supporting legal compliance, safety improvements, and employee care․ By including this information, the organization provides a clear and comprehensive account of the incident’s medical aspects, ensuring that the employee’s health and safety remain a top priority․ This section underscores the importance of thorough documentation in accident reporting, enabling the organization to address incidents with professionalism and care․ The detailed information in this section supports effective decision-making, legal compliance, and ongoing safety improvements, making it an essential part of the reporting process․ By prioritizing the documentation of medical care, the organization ensures that the incident is managed responsibly, fostering a culture of safety and accountability in the workplace․ This approach benefits both the organization and its employees, supporting accountability, transparency, and continuous improvement in workplace safety․ In conclusion, the medical evaluation and immediate actions taken are essential components of a comprehensive accident report, providing critical insights into the incident’s impact on the employee’s health․ The accurate documentation of this information ensures that the organization meets its legal and ethical obligations, supports the employee’s recovery, and implements measures to prevent future incidents․ By prioritizing the medical aspects of the incident, the organization demonstrates its commitment to employee well-being and responsible incident management, fostering a safe and supportive work environment․ This section is thus a critical part of the accident reporting process,

Detailed Circumstances of the Accident

This section outlines the specific events leading to the accident, including the task being performed, environmental factors, and equipment involved, providing a clear understanding of the incident․

manual tabla de medidas para doblar tubo conduit

Conduit tubing bending is a fundamental skill in electrical installations, requiring precise measurements and techniques to achieve smooth, professional bends. Measurement tables are essential for accuracy, ensuring proper angles and lengths are maintained across various conduit sizes and materials, optimizing the bending process for reliability and safety.

1.1. Overview of Conduit Tubing

Conduit tubing refers to sturdy, hollow tubes designed to protect and route electrical wires in various installations. Available in different materials like galvanized steel, PVC, and aluminum, conduit tubing offers durability and flexibility. Common types include EMT (Electrical Metal Tubing) and rigid conduit, each suited for specific environments. Conduit tubing is widely used in commercial and residential settings to ensure safe and organized electrical systems. Its versatility and strength make it a critical component in modern electrical infrastructure, requiring precise bending techniques for proper installation.

1.2. Importance of Proper Bending Techniques

Proper bending techniques are essential for achieving precise angles and maintaining the structural integrity of conduit tubing. Incorrect bending can lead to kinks, cracks, or uneven curves, compromising the electrical system’s safety and reliability. Using measurement tables ensures accuracy, while proper force application prevents damage. Well-executed bends minimize the need for adjustments and rework, saving time and materials. Adhering to bending standards is crucial for compliance with electrical codes and for ensuring long-term system performance and safety in various environments.

1;3. Purpose of a Measurement Table

A measurement table serves as a critical reference guide for conduit bending, providing precise calculations for achieving accurate bends. It outlines distances, angles, and multipliers necessary for various conduit sizes and materials. By using the table, installers can determine the exact marking points and bending forces required. This ensures consistency, reduces errors, and optimizes the bending process. The table also helps in navigating complex bends, such as offsets and multiple angles, by offering standardized measurements. Its ultimate goal is to streamline the bending process, ensuring reliability and compliance with installation standards.

Tools and Equipment for Bending Conduit Tubing

Conduit benders, measurement tools, and multipliers are essential for precise bending. Additional hardware, like dies and lubricants, ensures smooth operations and protects the conduit during the process.

2.1. Conduit Benders and Their Types

Conduit benders are specialized tools designed to form precise bends in tubing. Manual, hydraulic, and electric benders are common types, each suited for specific conduit sizes and materials. Manual benders are cost-effective and portable, ideal for small-scale projects. Hydraulic and electric benders offer greater force and precision, often used in industrial settings. Interchangeable dies allow benders to accommodate various tube diameters. Proper selection ensures accurate bends, minimizing damage to the conduit. Regular maintenance of benders is crucial for optimal performance and longevity.

2.2. Measurement Tools for Accurate Bending

Measurement tools are crucial for accurate conduit bending, ensuring precise angles and lengths. Key tools include measurement tables, which provide essential data for various conduit sizes and materials, marking gauges for transferring measurements onto the tubing, and digital calipers for exact diameter and thickness measurements. These tools help avoid errors and damage, ensuring smooth, professional bends. Proper use of these tools is essential for achieving the desired results in electrical installations.

2.3; Additional Hardware and Accessories

Beyond the primary bending tools, additional hardware and accessories are essential for efficient conduit bending. These include bending dies tailored to specific conduit sizes, spring loaders to secure the tubing, and lubricants to reduce friction during the bending process. Storage cases and organizers are also crucial for maintaining tool condition and accessibility. Accessories like marking gauges and measuring tapes ensure precise alignment with the measurement table. These components collectively enhance the bending process, ensuring accuracy and extending tool longevity. Proper use of these accessories is vital for achieving professional results.

Understanding the Measurement Table

The measurement table is crucial for accurate conduit bending, providing essential data like bend radii and take-out dimensions. It ensures precise, professional bends with minimal waste.

3.1. Structure and Layout of the Table

Conduit bending measurement tables are meticulously structured to facilitate precise and efficient bending. They typically feature columns dedicated to different conduit sizes, with rows detailing specific angles and their corresponding bend radii, take-out dimensions, and multiplier factors. This organized layout allows electricians to quickly reference the necessary measurements for various scenarios, including offsets and multiple bends. The inclusion of multiplier tables aids in complex calculations, ensuring accuracy and consistency in achieving professional-grade conduit bends for electrical installations.

3.2. Key Measurements and Their Significance

Key measurements in conduit bending tables include bend radius, take-out dimensions, and multiplier factors. The bend radius ensures the conduit curves smoothly without kinking or deforming. Take-out measurements indicate how much material must be removed to achieve the desired angle, critical for maintaining structural integrity. Multiplier factors are used to calculate offsets and complex bends, ensuring precision in multi-angle installations. These measurements are vital for achieving professional-grade bends, preventing damage to the conduit, and ensuring reliable electrical connections.

3.3. How to Interpret the Data

To interpret the data in conduit bending tables, locate the necessary measurements for your specific conduit size and desired bend angle. Mark the conduit at the specified distances to guide the bending process accurately. Use the table to determine the correct take-out and multiplier factors for offsets or complex bends. Apply steady force while bending, ensuring the conduit aligns with the markings. Monitor the bend’s progress to achieve the precise angle without over-bending, ensuring the conduit remains undamaged and maintains its structural integrity for reliable electrical connections.

Preparation for Bending

Measure and mark the conduit according to the measurement table, ensuring accurate alignment. Cut the conduit to the required length using appropriate tools. Clean the conduit and bender to ensure smooth bending.

4.1. Cutting the Conduit to the Required Length

Cutting the conduit to the correct length is crucial for accurate bending. Use a hacksaw or pipe cutter, ensuring clean, straight cuts. Refer to the measurement table for precise length requirements. Measure twice to avoid errors, and deburr the cut ends to prevent damage during bending. Proper cutting ensures the conduit fits the planned layout and allows for smooth, precise bends. Clean cuts are essential for maintaining the integrity of the conduit and achieving professional results in electrical installations.

4.2. Marking the Conduit for Bending

Accurate marking of the conduit is essential for precise bending. Use a measurement table to determine the exact points for bending. Measure and mark the conduit at the specified distances, ensuring alignment with the bender. Clearly mark the center point and reference lines for multi-bend scenarios. Double-check the measurements to avoid errors. Use a marker or pencil to make visible marks, ensuring they remain legible during the bending process. Proper marking ensures the conduit bends accurately and fits the intended application perfectly.

4.3. Aligning the Bender with the Markings

Aligning the bender with the conduit markings is critical for accurate bending. Place the conduit on a stable surface and position the bender so that its guide aligns with the marked center point or reference line. Ensure the markings are clearly visible and properly positioned relative to the bender’s edge. Use clamps or holding mechanisms to secure the conduit and prevent movement during the bending process. Double-check the alignment to ensure precision and safety. Proper alignment guarantees that the bend will be made at the correct angle and location, avoiding costly errors or unsafe conditions. This step requires patience and attention to detail to achieve professional results.

The Bending Process

The bending process involves applying controlled force while monitoring the conduit’s alignment and curvature. Use the measurement table to ensure accuracy and adjust as needed for precise results.

5.1. Applying the Correct Force and Technique

Applying the correct force and technique is crucial for precise conduit bending. Use the measurement table to determine the exact bending angle and length. Position the conduit securely in the bender, aligning the marked points with the bending die. Apply steady, controlled force to avoid kinking or deforming the tubing. Gradually bend the conduit to the desired angle, ensuring it matches the specified measurements. Over-bending can damage the tubing, so monitor the process closely and adjust as needed for accuracy and consistency.

5.2. Monitoring the Bend for Accuracy

Monitoring the bend for accuracy ensures the conduit meets the required specifications. Use the measurement table to verify the angle and alignment. Check the bend against the marked points and adjust if necessary. A protractor or bending gauge can help confirm the angle. Visually inspect the conduit for any kinks or deformations. If the bend is inaccurate, carefully reverse the process and re-bend the conduit, ensuring alignment with the original markings. Precision is key to achieving a professional and functional installation.

5.3. Adjusting the Bend if Necessary

If the bend doesn’t meet the required specifications, carefully assess and adjust it. Use a protractor or bending gauge to measure the angle against the measurement table. Small adjustments can be made by slightly rotating the conduit while applying controlled force. For larger corrections, it may be necessary to partially unbend and re-bend the conduit, ensuring alignment with the original markings. Always maintain the integrity of the tubing to avoid kinks or damage. Re-check the bend for accuracy before finalizing the installation.

Common Bending Scenarios

Conduit tubing bending often involves standard scenarios like 90-degree turns, offsets, and multiple angles. These scenarios are essential for electrical installations and rely on measurement tables for accuracy.

6.1. Bending at 90 Degrees

Bending conduit tubing at 90 degrees is a common requirement in electrical installations. Using a measurement table, mark the conduit at the specified distance for a 90-degree bend. Ensure the bender is aligned correctly with the markings. Apply steady force while bending, monitoring the angle to maintain accuracy. This technique is fundamental for creating sharp, professional-looking corners in conduit installations, ensuring reliability and safety in electrical systems.

6.2. Bending for Offset and Multiple Angles

Bending conduit tubing for offsets and multiple angles requires precise calculations and measurements. Use the measurement table to determine the correct distances for each bend, ensuring proper alignment and spacing. Mark the conduit accurately, then position the bender according to the markings. Apply consistent force while bending to maintain the desired angles. For multiple bends, carefully measure and mark each segment, ensuring the overall structure remains stable and visually appealing. This technique is crucial for complex electrical installations where precise offsets and angles are necessary.

6;3. Specialized Bends for Complex Installations

Specialized bends are required for complex installations, such as helical bends or curved offsets, ensuring proper conduit routing. Use the measurement table to calculate precise offsets and angles, marking the conduit accordingly. Apply the bender carefully, maintaining consistent force to achieve the desired shape. For intricate layouts, multiple bends may be necessary, requiring meticulous planning and execution. This technique is essential for installations involving tight spaces or unique structural requirements, ensuring stability and functionality while maintaining the integrity of the conduit. Precision is key to avoiding costly rework and ensuring reliability.

Troubleshooting Common Issues

Troubleshooting common bending issues involves identifying inaccuracies, addressing kinks, and adjusting for material variations. Use measurement tables to restore conduit integrity and ensure safe installations.

7.1. Dealing with Inaccurate Bends

Inaccurate bends can occur due to miscalculations or misalignment. To address this, refer to the measurement table to verify distances and angles. Recalculate the bend using the correct multiplier for the conduit size and desired angle. Ensure the bender is properly aligned with markings before applying force. If the bend is slightly off, adjust the conduit position and re-bend carefully. Consulting the table or manufacturer’s guidelines can help correct minor errors, ensuring the bend meets specifications for safe and reliable installations.

7.2. Fixing Kinks or Dents in the Conduit

Kinks or dents in conduit tubing can compromise its integrity and functionality. To fix these, gently heat the affected area using a heat gun or hair dryer to soften the material, then carefully reshape it with a bender or roller. Avoid excessive heating to prevent weakening the conduit. For minor dents, manually pressing them out with a tool may suffice. If the damage is severe, it’s best to cut out the damaged section and replace it with a new piece, ensuring the conduit remains structurally sound and safe for use.

7.3. Adjusting for Material Thickness Variations

Material thickness variations require careful adjustments to ensure accurate bending. Thicker conduit may need more force or a different bender size, while thinner materials demand precision to avoid kinking. Always refer to the measurement table for specific guidelines tailored to the conduit’s thickness. Applying consistent force and checking the bend with a radius gauge or template helps maintain accuracy. If the bend is uneven, slight adjustments to the bender’s position or force can correct the issue, ensuring the conduit meets the desired specifications without compromise. Proper adjustment ensures reliability and safety in electrical installations.

Safety Precautions

Always wear protective gear like gloves and safety glasses when bending conduit tubing. Ensure the work area is clear of obstacles and flammable materials. Properly secure tools and materials to prevent accidents. Avoid overexertion by using mechanical aids or seeking assistance for heavy tasks. Regularly inspect tools and equipment for damage to ensure safe operation. Keep loose clothing tied back and long hair tied up to avoid entanglement with machinery. Follow manufacturer guidelines for tool usage and material handling to maintain a safe working environment.

8.1. Handling Tools and Equipment Safely

Always inspect tools before use for damage or wear. Store equipment in a dry, secure location to prevent damage and rust. Wear protective gear like gloves and safety glasses to safeguard against injuries. Ensure the work area is clear of clutter to avoid tripping hazards. Follow ergonomic practices to prevent physical strain. Adhere to safety standards and regulations, such as those set by OSHA. Regular training and familiarization with tool operation are crucial for safe handling. Keep a first aid kit accessible and know emergency procedures in case of accidents.

8.2. Protecting the Work Area

Ensure the work area is clear of debris and flammable materials. Use protective coverings like drop cloths or plastic sheets to prevent damage to surfaces. Secure tools and equipment to avoid accidental movement. Properly illuminate the workspace to enhance visibility. Keep loose clothing and long hair tied back to prevent entanglement with tools. Store electrical components safely to avoid exposure to moisture. Regularly inspect the area for potential hazards and address them immediately. Maintain a clean and organized workspace to minimize risks and ensure efficient bending operations.

8.3. Preventing Physical Strain During Bending

To prevent physical strain, use ergonomic tools designed to reduce effort. Maintain proper posture and avoid bending at awkward angles. Take regular breaks to rest hands and arms. Ensure the work area is clear to minimize tripping hazards. Use mechanical aids like tube stands to support heavy conduit. Apply gentle, consistent force rather than brute strength to avoid muscle fatigue. Keep the workspace well-lit to reduce eye strain and maintain focus. Prioritize technique over force to ensure safe and efficient bending operations.

Advanced Techniques

Advanced techniques involve using multiplier tables for complex bends, bending around obstacles, and precision bending for high-tolerance applications, ensuring accuracy and efficiency in conduit tubing installations.

9.1. Using Multiplier Tables for Complex Bends

Multiplier tables simplify complex conduit bends by providing precise calculations for offsets and angles. These tables offer essential data, such as the radius of curvature, wall thickness limits, and minimum straight lengths. By multiplying the displacement distance by specific factors, technicians can accurately determine the necessary measurements. This method is particularly useful for handling obstacles or multiple bends, ensuring smooth transitions and maintaining conduit integrity. Proper use of multiplier tables minimizes errors and saves time, making them indispensable for intricate installations.

9.2. Bending Tubing Around Obstacles

Bending conduit tubing around obstacles requires precise planning and measurement. Using the measurement table, determine the distance between key points and mark the conduit accordingly. Apply the multiplier technique to calculate the exact bend radius and offset needed. Ensure the bender is aligned with the markings for accurate results. This method allows for smooth navigation around obstacles while maintaining the conduit’s structural integrity. Proper alignment and careful execution ensure reliable and professional-grade bends, even in complex scenarios.

9.3. Precision Bending for High-Tolerance Applications

Precision bending is critical for high-tolerance applications, requiring meticulous attention to detail. Utilize the measurement table to determine exact angles and offsets, employing the multiplier technique for accuracy. Align the bender precisely with marked measurements to minimize material deformation. This method ensures professional-grade bends that meet strict specifications, essential for applications where precision is paramount. By following these steps, you achieve reliable and consistent results, maintaining the conduit’s structural integrity and performance in demanding environments.

Maintenance and Care

Regularly clean and lubricate the bender to ensure smooth operation. Store conduit and tools in a dry, protected area to prevent damage. Inspect equipment frequently for wear.

10.1. Cleaning and Lubricating the Bender

Clean the bender regularly with a soft cloth to remove dirt and debris. Lubricate moving parts, such as hinges and gears, to ensure smooth operation. This prevents rust and wear, maintaining accuracy in bends.

Use a silicone-based lubricant for durability. Clean the conduit before bending to avoid contamination. Proper maintenance extends the tool’s lifespan and ensures consistent, precise bending results every time.

10.2. Storing the Conduit and Tools Properly

Store conduit tubing in a dry, clean environment, away from direct sunlight to prevent warping or degradation. Use protective covers or cases for tools to avoid damage. Keep the bender and accessories in a designated area to ensure easy access and prevent loss. Regularly inspect stored items for signs of wear or damage. Proper storage maintains tool condition and prevents rust, ensuring optimal performance during future bending tasks.

10.3. Regular Inspection of Equipment

Regularly inspect conduit bending equipment to ensure optimal performance. Check for wear on dies, bending shoes, and pivot pins. Clean and lubricate moving parts to prevent rust and corrosion. Inspect the conduit tubing for damage or deformation before use. Ensure all tools are stored properly to maintain their condition. Regular inspections help identify potential issues early, preventing costly repairs and ensuring precise, professional bends in conduit tubing. This routine maintenance extends the lifespan of both tools and materials, guaranteeing reliable results in every bending task.

Resources and References

Refer to official manufacturer manuals, online tutorials, and training courses for detailed guidance. Utilize YouTube videos and official websites for visual demonstrations and updated specifications on conduit bending techniques.

11.1. Recommended Manuals and Guides

Consult official manufacturer manuals like the NEC guidelines and ASTM standards for detailed specifications. Utilize training manuals from reputable sources like Klein Tools and Greenlee for practical insights. Additionally, refer to technical guides from electrical supply companies for specific conduit types. Online resources such as YouTube tutorials and forums provide visual demonstrations. Always ensure materials are up-to-date with current industry standards for accurate and safe bending practices. These resources offer comprehensive guidance for mastering conduit bending techniques.

11.2. Online Tutorials and Videos

Online tutorials and videos provide hands-on guidance for conduit bending. Platforms like YouTube offer detailed step-by-step instructions, while TikTok features quick tips from experienced electricians. Videos often cover topics like using measurement tables, troubleshooting common issues, and mastering advanced techniques. Many tutorials include demonstrations of specific tools, such as conduit benders, and showcase real-world applications. These resources are ideal for visual learners and those seeking practical examples to supplement theoretical knowledge.

11.3. Manufacturer Specifications

Manufacturer specifications are crucial for ensuring conduit bending accuracy. They provide detailed measurement tables tailored to specific conduit sizes, materials, and thicknesses. These specs often include recommended bending radii, maximum allowable angles, and tool compatibility. By following manufacturer guidelines, electricians can achieve consistent, professional results. Many manufacturers also offer certified tools and accessories designed to work seamlessly with their conduit products, ensuring compliance with industry standards and safety protocols. Adhering to these specifications helps prevent errors and guarantees reliable electrical installations.

Mastering conduit tubing bending requires precision, practice, and adherence to measurement tables. Proper techniques ensure safe and reliable electrical installations, making it a valuable skill for any electrician to refine and master.

12.1. Recap of Key Principles

Mastering conduit tubing bending involves understanding measurement tables, precise marking, and proper tool alignment. Key principles include using correct multipliers, ensuring accurate bends, and adapting to material thickness. Proper handling of tools and adherence to safety guidelines are crucial. Regular practice and attention to detail enhance proficiency, ensuring reliable and professional electrical installations. Understanding the physics behind bending and material behavior further refines skills, making the process efficient and safe for all applications.

12.2. Encouragement for Further Practice

Consistent practice is key to mastering conduit tubing bending. Start with simple bends and gradually tackle complex scenarios. Use measurement tables and multipliers to refine your technique. Experiment with different materials and tools to build confidence. Analyzing common mistakes and learning from them will enhance your skills. Remember, precision and patience are essential for achieving professional results. Keep practicing, and you’ll soon excel in creating accurate, reliable bends for any electrical installation, ensuring safety and efficiency in every project.

12.3. Final Tips for Mastery

To achieve mastery in conduit tubing bending, always refer to measurement tables for precise calculations. Ensure tools are properly aligned and maintained for optimal performance. Avoid over-bending, as it can cause damage or kinks. Practice smooth, controlled movements to maintain conduit integrity. Regularly inspect your work for accuracy and adherence to safety standards. Stay updated with new techniques and materials to refine your skills. Mastery requires patience, dedication, and attention to detail, ensuring every bend meets professional and safety expectations in electrical installations.

PDF

harry potter and the order of the phoenix book pdf

Harry Potter and the Order of the Phoenix, the fifth book in J․K․ Rowling’s series, follows Harry’s challenges during his fifth year at Hogwarts․ Published by Scholastic Press, the book explores themes of rebellion and loss, with Harry forming Dumbledore’s Army to counter the Ministry’s denial of Voldemort’s return․ The PDF version is widely available, offering a convenient way to experience this pivotal story in Harry’s journey․

Background of the Book

Published in 2003, Harry Potter and the Order of the Phoenix is the fifth installment in J․K․ Rowling’s beloved series․ The book explores Harry’s challenges during his fifth year at Hogwarts, including the Ministry of Magic’s denial of Voldemort’s return and the formation of Dumbledore’s Army․ The story delves into themes of rebellion, loss, and the struggle for truth․ The PDF version of the book has gained popularity for its convenience, allowing readers to access the story digitally․ Its release marked a significant moment in the series, as it deepened the magical world’s complexity and Harry’s emotional journey․ The book’s themes and plot twists have made it a fan favorite, with the PDF format ensuring its accessibility to a modern audience․

Author and Publication Details

Harry Potter and the Order of the Phoenix was authored by the renowned British writer J․K․ Rowling․ The book was published in 2003 by Scholastic Press under the Arthur A․ Levine Books imprint․ It is the fifth installment in the Harry Potter series, which has captivated readers worldwide with its magical storytelling․ The book features illustrations by Mary GrandPré, enhancing its visual appeal․ The PDF version of the book is widely available, offering readers a convenient way to access the story․ With its rich narrative and intricate plot, the novel has become a cornerstone of modern fantasy literature, further solidifying Rowling’s legacy as a masterful storyteller․ The PDF edition ensures the book’s accessibility to a global audience․

The Plot Summary

Harry returns to Hogwarts amidst denial of Voldemort’s return, facing challenges as the Ministry manipulates truth․ He forms Dumbledore’s Army, while Sirius’s death deepens his emotional struggle․

Harry’s Return to Hogwarts

Harry’s fifth year begins with his return to Hogwarts, where he faces increased emotional turmoil and isolation․ The Ministry of Magic’s denial of Voldemort’s return has created a tense atmosphere, with many believing Harry is lying․ Upon his arrival, Harry finds the school under the oppressive rule of Dolores Umbridge, the Ministry-appointed Defense Against the Dark Arts teacher, who refuses to teach practical defensive magic․ Frustrated and concerned, Harry takes matters into his own hands, forming Dumbledore’s Army to train his peers in real defensive techniques․ This act of rebellion highlights Harry’s growing determination to confront the Dark Lord, despite the challenges he faces․

The Formation of Dumbledore’s Army

In response to Umbridge’s ineffective teaching, Harry forms Dumbledore’s Army, a secret group of students learning defensive magic․ The group, initially met with skepticism, gains traction as Harry’s leadership and knowledge inspire confidence․ Meetings in the Room of Requirement allow them to practice spells and strategies without detection․ The DA becomes a symbol of resistance against the Ministry’s interference and Umbridge’s tyranny․ Neville, Ginny, and Luna emerge as key members, showcasing their talents․ The DA’s growth reflects Harry’s maturation and his understanding of the importance of unity and preparation against Voldemort’s looming threat․

The Ministry of Magic’s Denial of Voldemort’s Return

The Ministry of Magic refuses to acknowledge Voldemort’s return, fearing public panic and undermining Dumbledore’s credibility․ Cornelius Fudge believes Dumbledore fabricated the story to gain power․ This denial leads to the appointment of Dolores Umbridge as Hogwarts’ High Inquisitor, who stifles defensive magic teaching․ Harry’s warnings are dismissed, isolating him further․ The Ministry’s actions escalate tensions, as they prioritize maintaining a false sense of security over addressing the real threat․ This refusal to accept reality cripples the wizarding world’s preparedness, allowing Voldemort’s influence to grow unchecked and setting the stage for conflict․

Key Characters in the Book

Harry Potter, the brave protagonist, faces darkness and doubt․ Lord Voldemort returns, spreading evil and fear․ Albus Dumbledore provides wisdom and guidance, shaping the story’s core conflicts and themes․

Harry Potter’s Emotional Journey

Harry Potter’s emotional journey in “The Order of the Phoenix” is marked by intense struggles with anger, isolation, and grief․ The denial of Voldemort’s return by the Ministry and the wizarding community leaves Harry feeling abandoned and misunderstood․ His frustration grows as he faces skepticism from his peers and even some adults․ The tragic loss of Sirius Black, a father figure to Harry, deepens his pain and sense of abandonment․ However, through his interactions with Dumbledore and the formation of Dumbledore’s Army, Harry learns to channel his emotions and embrace his destiny․ This book highlights Harry’s growth from a conflicted teenager to a determined leader, prepared to face the challenges ahead․

Lord Voldemort’s Role in the Story

Lord Voldemort’s role in “Harry Potter and the Order of the Phoenix” is pivotal as he returns to power and manipulates events from the shadows․ The Ministry of Magic’s denial of his resurgence allows Voldemort to strengthen his followers, the Death Eaters, and spread fear throughout the wizarding world․ His influence is felt through the rise of the Death Eaters and the corruption of key institutions, such as the Ministry and Hogwarts․ Voldemort’s strategy to isolate Harry and undermine Dumbledore’s authority drives much of the plot․ His actions lead to the Battle of the Department of Mysteries, a climactic confrontation that reveals the prophecy connecting Harry and Voldemort, setting the stage for the ultimate showdown in future books․

Dumbledore’s Leadership and Wisdom

Albus Dumbledore’s leadership and wisdom are central to “Harry Potter and the Order of the Phoenix․” As the founder of the Order, Dumbledore guides the fight against Voldemort with strategic foresight and moral clarity․ His wisdom is evident in his ability to inspire loyalty and unity among allies, even as the Ministry denies Voldemort’s return․ Dumbledore’s deep understanding of human nature and his capacity for empathy allow him to mentor Harry effectively, helping him navigate the complexities of destiny and emotion․ His leadership is marked by patience, insight, and a commitment to fighting darkness with light, making him a cornerstone of the story’s moral framework․

Themes and Symbolism

The book explores rebellion against oppressive authority, the power of friendship, and the struggle between light and darkness․ Symbols like the Marauder’s Map and Hogwarts itself reinforce these themes, highlighting unity and resilience in the face of adversity․

Loss and Grief

Sirius Black’s death in Harry Potter and the Order of the Phoenix marks a profound turning point in Harry’s emotional journey․ This loss intensifies Harry’s feelings of isolation and despair, as he grapples with the harsh realities of death and betrayal․ The book explores grief as a universal human experience, showing how it shapes Harry’s understanding of the wizarding world and his own destiny; The absence of Sirius, a father figure, leaves Harry with a deep sense of abandonment, influencing his decisions and relationships throughout the story․ This theme underscores the personal and emotional stakes of Harry’s fight against Voldemort, making his journey even more poignant and relatable․ The PDF version captures this emotional depth, allowing readers to reflect on loss and resilience in the face of darkness․

Rebellion and Resistance

In Harry Potter and the Order of the Phoenix, rebellion and resistance are central themes as Harry and his allies challenge the Ministry of Magic’s denial of Voldemort’s return․ The formation of Dumbledore’s Army represents a direct defiance against the oppressive policies enforced by the Ministry and Hogwarts’ administration․ Harry’s leadership fosters a sense of unity and purpose among his peers, who are determined to stand against the Dark Lord․ The book highlights the power of collective resistance, as characters like Neville, Ginny, and Luna courageously confront authority․ This rebellion not only protects Hogwarts but also symbolizes the broader fight against tyranny and misinformation․ The PDF version of the book vividly captures these acts of defiance, emphasizing the importance of standing up for truth in the face of oppression․

The Power of Friendship and Loyalty

In Harry Potter and the Order of the Phoenix, the power of friendship and loyalty plays a pivotal role in Harry’s journey․ Ron and Hermione’s unwavering support helps Harry navigate the challenges of fighting Voldemort and the Ministry’s interference․ The bond between the trio strengthens as they face adversity together, exemplifying the enduring power of true friendship․ Additionally, the loyalty of other characters, such as Neville and Luna, highlights the importance of standing by one another, even in the face of danger․ The Marauders’ legacy, revealed through the Marauder’s Map, further emphasizes the lasting impact of loyalty and camaraderie․ The PDF version of the book beautifully captures these moments, illustrating how friendship becomes a powerful force against darkness․

The Book’s Reception and Impact

Harry Potter and the Order of the Phoenix received widespread acclaim for its deep themes and emotional depth․ The book’s popularity soared, solidifying its place in the series․ Its PDF version remains highly sought after, reflecting its enduring influence on the Harry Potter fandom and culture worldwide․

Critical Acclaim and Reviews

Harry Potter and the Order of the Phoenix received widespread critical acclaim for its emotional depth and complex storytelling․ Critics praised J․K․ Rowling’s ability to weave humour, suspense, and drama seamlessly, creating a captivating narrative․ The book was noted for its darker tone and exploration of themes like loss and rebellion, which resonated deeply with readers․ Many reviewers highlighted Harry’s emotional journey and the moral complexity introduced in this installment․ The PDF version of the book has been particularly popular, allowing fans to experience the story in a convenient digital format․ Its success solidified the series’ place in literary history, cementing its influence on modern fantasy․

Commercial Success and Sales

Harry Potter and the Order of the Phoenix achieved remarkable commercial success, becoming one of the fastest-selling books in history․ Its release in 2003 saw unprecedented demand, with millions of copies sold worldwide․ The book’s popularity was further boosted by the availability of its PDF version, which allowed readers to access the story digitally․ This format contributed significantly to its widespread distribution and accessibility․ The book’s success was a testament to the enduring appeal of the Harry Potter series, with sales figures reflecting its global impact․ The PDF edition remains a sought-after format, ensuring the story reaches an even broader audience and maintaining its commercial viability years after publication․

Fandom and Cultural Influence

The release of Harry Potter and the Order of the Phoenix in PDF format further amplified its cultural impact, allowing fans worldwide to engage with the story digitally․ The book’s themes of rebellion and loss resonated deeply, inspiring fan art, discussions, and cosplay․ The formation of Dumbledore’s Army became a symbol of resistance, influencing fan-created content and inspiring fan fiction․ The PDF version facilitated easy sharing, making it a central piece in the Harry Potter fandom․ Its influence extended beyond literature, shaping pop culture and solidifying the series’ legacy․ The book remains a cornerstone of the franchise, with its digital availability ensuring its message of hope and resilience continues to inspire new generations of readers․

The PDF Version of the Book

The PDF version of Harry Potter and the Order of the Phoenix is widely available for download, offering a convenient and accessible way to read the book digitally․

Availability and Download Options

The PDF version of Harry Potter and the Order of the Phoenix is readily available online through various platforms, including GitHub and FlipBuilder․ Fans can easily download the file, which is often shared in digital libraries and repositories․ The PDF format ensures compatibility with multiple devices, allowing readers to access the book on smartphones, tablets, or computers․ Additionally, platforms like Adobe Acrobat Reader support seamless viewing of the file․ With its widespread availability, the digital version has become a popular choice for readers seeking convenience and portability․ This accessibility has further expanded the book’s reach and appeal to a global audience․

Reading the Book in Digital Format

Reading Harry Potter and the Order of the Phoenix in PDF format offers a modern and flexible way to enjoy the story․ The digital version allows readers to adjust font sizes, bookmark pages, and access the text from various devices․ This convenience is especially appealing for those who prefer on-the-go reading․ The PDF retains the original layout and illustrations, ensuring an authentic experience․ Additionally, features like search functions enable quick navigation through the book․ The digital format has become a preferred choice for many fans, blending tradition with technological advancements to enhance the reading experience while maintaining the magic of the original text․

Benefits of the PDF Edition

The PDF edition of Harry Potter and the Order of the Phoenix offers numerous advantages․ It is space-saving, eliminating the need for physical storage, and environmentally friendly by reducing paper use․ The digital format is highly portable, allowing readers to carry the book on multiple devices․ Additionally, PDFs are cost-effective and easily accessible, making the story reachable to a broader audience․ The format also ensures that the book remains pristine, avoiding wear and tear․ With features like highlighting and note-taking, readers can engage more deeply with the text․ Overall, the PDF edition provides a convenient, durable, and adaptable way to experience the magical world of Harry Potter․

Related Books and Resources

Explore related magical texts like “The Book of Spells” and “A History of Magic,” which complement the Harry Potter series and its enchanting universe․

Previous Books in the Series

The Harry Potter series by J․K․ Rowling includes four books preceding “Harry Potter and the Order of the Phoenix․” The first, “Harry Potter and the Sorcerer’s Stone,” introduces Harry’s discovery of his magical identity and his first year at Hogwarts․ The second, “Harry Potter and the Chamber of Secrets,” explores the mysteries of a hidden chamber within the school․ The third, “Harry Potter and the Prisoner of Azkaban,” delves into the truth about Sirius Black and his connection to Harry’s parents․ The fourth, “Harry Potter and the Goblet of Fire,” sees Harry unexpectedly competing in the Triwizard Tournament and the return of Lord Voldemort․ These books set the stage for the events in “Order of the Phoenix,” where Harry faces new challenges and deeper complexities in his magical world․

Related Magical Texts and Guides

Several magical texts and guides complement “Harry Potter and the Order of the Phoenix,” offering deeper insights into the wizarding world․ “The Book of Spells” by Miranda Goshawk and “A History of Magic” by Bathilda Bagshot provide foundational knowledge of magic and its history․ Additional resources, such as “Nature’s Nobility: A Wizarding Genealogy,” explore the complexities of magical families and their legacies․ These texts, along with study guides for magical theory and potion-making, enrich the reading experience of “Order of the Phoenix” by expanding on the lore and magical concepts introduced in the book․ They are available in PDF formats for convenient access and further study․

Companion Books by J․K․ Rowling

J․K․ Rowling has written several companion books to the Harry Potter series, enhancing the magical universe․ “Fantastic Beasts and Where to Find Them” and “The Tales of Beedle the Bard” offer insights into magical creatures and folklore․ These works, available in PDF, complement “Order of the Phoenix” by expanding the wizarding world’s richness and depth․ They provide additional context to the events and creatures mentioned in the main series, enriching readers’ understanding of the Harry Potter universe․ These companion books are cherished by fans and are readily accessible in digital formats for those exploring the series’ expanded lore․

“Harry Potter and the Order of the Phoenix” remains a pivotal book in the series, exploring themes of rebellion and loss․ Its PDF availability ensures accessibility, solidifying its enduring impact on readers worldwide․

Final Thoughts on the Book’s Significance

“Harry Potter and the Order of the Phoenix” stands as a profound exploration of resilience, friendship, and the fight against oppression․ Its deeply emotional narrative, marked by Sirius’s tragic death, underscores the cost of rebellion and the weight of leadership․ Harry’s journey from frustration to understanding highlights the complexity of growing up․ The book’s themes of unity and resistance resonate universally, making it a cornerstone of the series․ The availability of the PDF version ensures its timeless message reaches readers globally, cementing its place as a tale of hope and courage in the face of darkness․

Legacy of “Harry Potter and the Order of the Phoenix”

“Harry Potter and the Order of the Phoenix” leaves an indelible mark on the series, deepening the wizarding world’s complexity․ Its exploration of rebellion, loss, and leadership solidified its place as a fan favorite․ The PDF version ensures its accessibility, allowing readers to revisit Harry’s emotional journey and the forming of Dumbledore’s Army․ The book’s themes of resistance and unity resonate globally, influencing both literature and culture․ Its legacy endures as a testament to the power of storytelling, inspiring new generations to embrace courage and hope in the face of darkness․ The PDF format has further cemented its reach, making it a timeless classic in the Harry Potter saga․

manual for 2012 ford fusion

Welcome to the official manual for the 2012 Ford Fusion, your comprehensive guide to understanding and maintaining your vehicle. This manual provides essential information on features, safety systems, and maintenance to ensure optimal performance and longevity.

Overview of the 2012 Ford Fusion

The 2012 Ford Fusion is a midsize sedan designed to deliver a blend of style, comfort, and performance. Available in various trims, including S, SE, SEL, and Sport, it offers a range of engine options such as a 2.5L four-cylinder, 3.0L V6, and a hybrid variant. The Fusion combines modern design with advanced features like SYNC infotainment, Bluetooth connectivity, and a premium audio system. Its spacious interior, versatile seating, and safety features like airbags and electronic stability control make it a practical choice for both families and individual drivers. This overview highlights the key aspects of the 2012 Ford Fusion, ensuring a smooth and enjoyable driving experience.

Importance of Reading the Manual

Reading the 2012 Ford Fusion manual is crucial for understanding your vehicle’s features, optimizing performance, and ensuring safety. It provides detailed instructions for maintaining your car, troubleshooting issues, and customizing settings. By familiarizing yourself with the manual, you can maximize fuel efficiency, properly use advanced systems like SYNC and Bluetooth, and understand safety features such as airbags and stability control. Regular maintenance schedules and DIY tips are also included, helping you save money and extend your vehicle’s lifespan. Whether you’re a new owner or a seasoned driver, the manual is an essential resource for getting the most out of your 2012 Ford Fusion.

Vehicle Overview and Specifications

The 2012 Ford Fusion is a stylish mid-size sedan offering a blend of performance, comfort, and technology. It features a range of engine options, impressive fuel efficiency, and advanced safety systems, making it a versatile choice for drivers. Available in multiple trims, the Fusion combines practicality with modern features to enhance the driving experience.

Engine Options and Performance

The 2012 Ford Fusion offers a variety of engine options to suit different driving preferences. The base model features a 2.5-liter four-cylinder engine, delivering 175 horsepower and 172 lb-ft of torque, providing excellent fuel efficiency. For those seeking more power, a 3.0-liter V6 engine is available, producing 240 horsepower and 223 lb-ft of torque. Additionally, a hybrid model combines a 2.5-liter Atkinson-cycle four-cylinder engine with an electric motor, offering smooth and eco-friendly performance with outstanding fuel economy. The Sport trim features a powerful 3.5-liter V6 engine, generating 263 horsepower and 249 lb-ft of torque, designed for drivers who prioritize performance and responsiveness. Each engine option ensures a balanced blend of power and efficiency, catering to diverse driver needs.

Trim Levels and Features

The 2012 Ford Fusion is available in four distinct trim levels: S, SE, SEL, and Sport. The base S trim includes essential features like power windows, AM/FM/CD audio, and manual climate control. The SE trim adds cruise control, steering wheel audio controls, and SYNC voice-activated systems for enhanced convenience. The SEL trim upgrades with premium audio, leather-trimmed seating, and a power driver’s seat. The Sport trim emphasizes performance with a more aggressive design, sport-tuned suspension, and exclusive styling elements. Each trim level offers a tailored driving experience, ensuring a blend of functionality, comfort, and style to meet individual preferences.

Fuel Efficiency and Capabilities

The 2012 Ford Fusion offers impressive fuel efficiency across its engine lineup. The base 2.5L four-cylinder engine achieves up to 23 MPG city and 33 MPG highway. The 3.0L V6 engine provides 20 MPG city and 28 MPG highway, while the 3.5L V6 delivers 19 MPG city and 27 MPG highway. For eco-conscious drivers, the Fusion Hybrid combines a 2.5L engine with an electric motor, achieving an estimated 41 MPG city and 36 MPG highway. Proper tire pressure, smooth acceleration, and maintaining consistent speeds further enhance fuel economy, ensuring the Fusion is both efficient and capable for everyday driving needs.

Safety Features and Precautions

The 2012 Ford Fusion is equipped with advanced safety features, including multiple airbags, anti-lock brakes, and electronic stability control. Always follow precautions outlined in the manual to ensure safe operation and maintenance of your vehicle.

Airbag Systems and Functionality

The 2012 Ford Fusion features a comprehensive airbag system designed to enhance passenger safety. Dual-stage front airbags, side airbags, and side-curtain airbags work together to provide protection in various collision scenarios. The system is integrated with the Personal Safety System, which includes sensors to detect crash severity and occupant conditions. Proper functionality is ensured through regular diagnostics and maintenance as outlined in the manual. Always follow the guidelines to avoid airbag-related injuries and ensure optimal protection. The system’s advanced technology helps mitigate potential harm, making it a critical component of the vehicle’s safety framework.

Seatbelts and Restraint Systems

The 2012 Ford Fusion is equipped with advanced seatbelt and restraint systems to ensure occupant safety. These systems include front outboard safety belts with energy management retractors, designed to reduce injury risk during collisions. The Belt-Minder™ feature alerts drivers and passengers if their seatbelts are not securely fastened. Additionally, the Personal Safety System integrates with airbags to optimize protection. Proper use of seatbelts is crucial, and the manual provides detailed instructions for adjusting and maintaining them. Regular inspections are recommended to ensure all components function correctly. Adhering to these guidelines helps maximize safety and effectiveness of the restraint systems in various driving conditions.

Child Safety and Restraint Guidelines

The 2012 Ford Fusion manual emphasizes the importance of proper child restraint systems to ensure safety for young passengers. Parents are advised to select a child seat based on the child’s age, weight, and height. The vehicle supports LATCH (Lower Anchors and Tethers for Children) attachments for secure installation. Booster seats are recommended for children who outgrow forward-facing seats but are still too small for adult belts. The manual provides detailed instructions for attaching child safety seats using both LATCH and safety belts. Regular inspections and maintenance of restraints are crucial to ensure effectiveness. Always follow these guidelines to protect child passengers in various driving conditions.

Comfort and Convenience Features

The 2012 Ford Fusion offers a range of comfort and convenience features, including AM/FM/CD/MP3 audio systems, dual-zone climate control, heated mirrors, and steering wheel controls for enhanced driving comfort and functionality.

Seating and Interior Adjustments

The 2012 Ford Fusion offers comfortable and adjustable seating options to suit various preferences. Drivers can adjust the front seats manually or opt for power-adjustable seats with lumbar support for enhanced comfort. Heated front seats are available in higher trims, providing warmth during colder months. The rear seats feature adjustable head restraints and a foldable design for added versatility. Additional interior adjustments include a tilt-and-telescoping steering wheel and customizable settings for optimal driver positioning. Storage compartments, such as seat-mounted cup holders and an armrest storage bin, add convenience for passengers. These features ensure a personalized and comfortable driving experience for all occupants.

Climate Control and Heating Systems

The 2012 Ford Fusion features advanced climate control systems designed for comfort and efficiency. The manual heating and air conditioning system allows drivers to adjust temperature, fan speed, and airflow direction. Dual automatic temperature control (DATC) provides independent settings for driver and passenger, ensuring personalized comfort. The dual-zone system, when equipped with navigation, integrates seamlessly with the vehicle’s controls. Regular maintenance, such as replacing the cabin air filter, is recommended to maintain optimal performance. These systems ensure a pleasant driving environment, whether cooling or heating, and are easily operated via intuitive controls. Proper use and maintenance of these features are detailed in the manual for a comfortable driving experience.

Entertainment and Audio Systems

The 2012 Ford Fusion offers a range of entertainment and audio systems designed to enhance your driving experience. The standard AM/FM/single CD MP3 satellite-compatible sound system provides high-quality audio playback. For added convenience, steering wheel-mounted controls allow drivers to adjust volume, change tracks, and manage phone calls without distraction. Optional upgrades include premium audio systems with amplified sound and advanced features like SYNC voice-activated technology. Satellite radio compatibility ensures access to a wide variety of music, news, and sports channels. These systems integrate seamlessly with Bluetooth-enabled devices and USB ports, offering flexible connectivity for modern smartphones and music players. The Fusion’s audio setup is tailored to deliver entertainment and connectivity at its best.

Driving and Performance

The 2012 Ford Fusion delivers a smooth and responsive driving experience with its 2.5L or 3.0L engine options and 6-speed automatic transmission. Higher trims feature a 3.5L V6 for enhanced power. The SelectShift® Automatic Transmission offers manual shift control, while the available All-Wheel Drive (AWD) system improves traction on various road conditions. Fuel efficiency is optimized with advanced engine technologies, ensuring a balanced blend of power and economy. The Fusion’s suspension and steering systems are tuned for precise handling, making it a joy to drive in both city and highway settings.

Fuel Efficiency Tips and Best Practices

To maximize fuel efficiency in your 2012 Ford Fusion, regular maintenance is key. Ensure proper tire pressure, as under-inflated tires reduce fuel economy. Change engine oil and air filters regularly to maintain optimal performance. Avoid aggressive driving habits, such as rapid acceleration or braking, as they lower MPG. Use cruise control on highways to maintain a steady speed. Remove unnecessary weight from the vehicle, as extra weight decreases efficiency. Plan trips to minimize miles driven and avoid excessive idling. Finally, follow the recommended maintenance schedule to keep your Fusion running efficiently. These practices will help you achieve the best possible fuel economy for your vehicle.

Transmission and Gearshift Operations

The 2012 Ford Fusion offers smooth and responsive transmission options, including a 6-speed automatic and a manual transmission (on select trims). For automatic models, the gearshift operates intuitively, with positions for Park (P), Reverse (R), Neutral (N), Drive (D), and Low (L). Use Low gear for steep inclines or towing. The SelectShift Automatic transmission allows manual gear changes for enhanced control. For manual transmission models, shift gears smoothly, ensuring the clutch is fully engaged between shifts. Avoid “riding” the clutch, as it can wear out the components. Proper use of the gearshift ensures efficient performance, fuel economy, and longevity of the transmission system.

All-Wheel Drive (AWD) System

The 2012 Ford Fusion offers an optional All-Wheel Drive (AWD) system, designed to enhance traction and control on various road conditions. The AWD system automatically distributes torque between the front and rear wheels, improving stability and reducing wheel slippage. It operates seamlessly in the background, requiring no driver input. For optimal performance, the system works in conjunction with the vehicle’s electronic stability control. When driving on slippery surfaces or uneven terrain, the AWD system ensures better grip and confidence. Regular maintenance, such as checking the AWD fluid levels, is recommended to maintain system efficiency. Detailed operation and maintenance guidelines can be found in the vehicle’s maintenance section.

Towing and Trailer Information

The 2012 Ford Fusion manual recommends using a tow dolly for towing, though it lacks detailed instructions or cautions beyond this suggestion. For safe towing, always follow the manufacturer’s guidelines and ensure your vehicle and trailer are properly equipped. Adhere to weight limits and use appropriate safety gear. If unsure, consult professional towing resources or a certified mechanic to ensure compliance with safety standards and prevent potential damage. Proper preparation and adherence to best practices are crucial for secure and effective towing operations.

Maintenance and Care

Regular maintenance is crucial for the 2012 Ford Fusion’s performance and longevity. Check tire pressure, transmission fluid, and engine oil regularly. Refer to the manual for detailed schedules and guidelines to ensure optimal care.

Scheduled Maintenance and Service Intervals

The 2012 Ford Fusion requires regular maintenance to ensure optimal performance. Follow the recommended service intervals for oil changes, tire rotations, and fluid checks. Typically, oil changes are needed every 5,000 to 7,500 miles. Tire pressure should be checked monthly and adjusted to the specified levels. Brake pads and rotors should be inspected every 12,000 miles or as needed. The transmission fluid and coolant levels should be monitored and topped off as required. The manual provides a detailed maintenance schedule in the “Normal Scheduled Maintenance and Log” section to keep your vehicle in peak condition; Always refer to the manual for specific guidelines tailored to your driving habits and conditions.

Fluid Checks and Replacement Guidelines

Regular fluid checks are crucial for maintaining your 2012 Ford Fusion’s performance and longevity. Engine oil should be checked monthly and changed every 5,000 to 7,500 miles. Coolant levels should be inspected to ensure proper engine temperature regulation. Transmission fluid levels must be monitored and topped off as needed, following the recommended schedule. Brake fluid should be checked for cleanliness and level, and windshield washer fluid should be refilled regularly. Always use the recommended fluid types, such as Motorcraft oil and the specified coolant mixture. Refer to the manual’s “Maintenance Product Specifications and Capacities” section for detailed guidelines on fluid replacement and intervals.

Tire Pressure Monitoring and Care

Proper tire pressure is essential for safety, fuel efficiency, and handling. Check tire pressure monthly and before long trips using the Tire Pressure Monitoring System (TPMS). The TPMS warns you if pressure drops below recommended levels. Refer to the vehicle label on the driver’s doorjamb for correct inflation values. Never set pressure lower than specified, as under-inflation can cause overheating and damage. Inspect tires for wear and damage regularly, and rotate them every 5,000 to 8,000 miles. Replace tires if tread depth reaches 1/16 of an inch. Use a spare tire temporarily and at speeds below 50 mph. Maintain tire health for optimal performance and safety.

Battery and Electrical System Maintenance

Regular maintenance of the 2012 Ford Fusion’s battery and electrical system ensures reliable performance. Inspect the battery terminals and cables for cleanliness and tightness. Check fluid levels in the reservoir and top them off with distilled water if necessary. Avoid deep discharging, as it can reduce battery life. When disconnecting the battery, always remove the negative cable first to prevent damage. Use a high-quality charger and follow proper charging procedures. Ensure all electrical components are turned off before charging. For 3.5L engines, note the fuel pump shut-off switch location. Keep the electrical system in top condition to prevent unexpected issues and maintain your vehicle’s efficiency;

Technical Specifications and Capacities

The 2012 Ford Fusion’s technical specifications include detailed engine, transmission, and suspension capacities, ensuring optimal performance and durability. Regular maintenance of these systems is crucial for reliability.

Engine and Transmission Specifications

The 2012 Ford Fusion offers a range of engine options, including a 2.5L I-4 engine producing 175 horsepower, a 3.0L V6 engine delivering 240 horsepower, and a 3;5L V6 engine generating 263 horsepower. Each engine is paired with a 6-speed automatic transmission, with the 2.5L option also available with a 6-speed manual transmission; The 2.5L hybrid model combines an electric motor with the engine for enhanced fuel efficiency. These powertrains provide a balance of power and efficiency, catering to diverse driving preferences. Understanding these specifications helps owners optimize performance, fuel economy, and maintenance schedules for their vehicle.

Fuel and Oil Recommendations

The 2012 Ford Fusion requires regular unleaded gasoline with an octane rating of 87 for most engines. For optimal performance, mid-grade or premium fuel is recommended for higher-output engines. The 2.5L I-4 engine uses 5W-20 synthetic blend oil, while the 3.0L and 3.5L V6 engines also require 5W-20. Oil capacity varies by engine, with the 2.5L requiring approximately 5 quarts and the V6 engines needing around 6 quarts. Always use the correct viscosity and type of oil to ensure proper lubrication and engine longevity. Regular oil changes and fuel checks are essential for maintaining your vehicle’s performance and efficiency. Refer to your manual for specific guidelines tailored to your engine type.

Brake and Suspension Systems

The 2012 Ford Fusion features a robust brake system with front and rear disc brakes, ensuring reliable stopping power. The Anti-Lock Braking System (ABS) enhances safety by preventing wheel lock-up during hard braking. Regular inspection of brake pads, rotors, and fluid levels is crucial for optimal performance. The suspension system, including MacPherson struts in the front and a multi-link setup in the rear, provides a smooth ride and responsive handling. Proper maintenance, such as checking for worn components and aligning the vehicle, ensures stability and comfort. Adhering to recommended service intervals helps maintain the integrity of these systems, ensuring your Fusion remains safe and enjoyable to drive.

Electrical and Lighting Systems

The 2012 Ford Fusion features a sophisticated electrical system designed for reliability and functionality. The vehicle is equipped with a high-capacity battery and alternator to support its advanced systems. Lighting includes halogen headlights, LED taillights, and optional fog lamps for improved visibility. The electrical system also powers features like the SYNC infotainment system, Bluetooth connectivity, and optional accessories. Regular checks of fuses, wiring, and connections are recommended to prevent malfunctions. For bulb replacement, consult the manual for specific guidelines to ensure proper fitment and safety. Always refer to the recommended torque specifications for battery terminals and electrical components to maintain system integrity and performance.

Safety Systems and Technologies

The 2012 Ford Fusion integrates advanced safety technologies, including airbags, anti-lock brakes, and traction control, to enhance protection and prevent accidents, ensuring a secure driving experience.

Advanced Driver-Assistance Systems

The 2012 Ford Fusion offers cutting-edge driver-assistance systems designed to enhance safety and convenience. These include features like the Blind Spot Information System (BLIS) with cross-traffic alert, which monitors blind spots and warns of approaching vehicles during lane changes or parking. Additionally, the Reverse Sensing System provides audible alerts to help detect obstacles when reversing. For improved visibility, the Rearview Camera System offers a clear view behind the vehicle, aiding in safe parking and maneuvering. These technologies work seamlessly to assist drivers in avoiding potential hazards, ensuring a safer and more confident driving experience.

Anti-Lock Braking System (ABS)

The Anti-Lock Braking System (ABS) in the 2012 Ford Fusion is a critical safety feature designed to prevent wheel lock-up during hard braking, ensuring vehicle stability and control. By rapidly pulsing the brakes, ABS helps maintain traction, reducing the risk of skidding and shortening stopping distances. This system is particularly effective on slippery or uneven surfaces, giving drivers greater confidence in emergency situations. ABS operates automatically and works in conjunction with other safety systems to enhance overall vehicle safety. Drivers may notice a noise or vibration when ABS activates, but this is normal and indicates the system is functioning properly. ABS is a standard feature on all 2012 Ford Fusion models, providing reliable protection for drivers and passengers alike.

Stability and Traction Control

The 2012 Ford Fusion features the AdvanceTrac electronic stability control system, which enhances vehicle stability by automatically adjusting engine power and applying individual brakes to help maintain control during challenging driving conditions. This system works in tandem with traction control to reduce wheel spin and improve grip on slippery surfaces. By monitoring data from sensors, such as steering wheel angle and vehicle speed, the system makes precise adjustments to keep the vehicle on its intended path. Stability and traction control are always active and operate seamlessly in the background, providing added confidence for drivers in adverse weather or sharp turns. These systems are essential for improving safety and handling performance.

Warranty and Support Information

The 2012 Ford Fusion is backed by a comprehensive warranty program, including Ford ESP Extended Service Plans for added protection. Genuine Ford parts and roadside assistance ensure peace of mind and reliable support for owners.

Understanding Your Vehicle Warranty

The 2012 Ford Fusion warranty provides comprehensive coverage for parts and labor, ensuring protection against defects in materials and workmanship. The program includes Ford ESP Extended Service Plans, offering additional protection beyond the standard warranty period. Owners can benefit from roadside assistance, which covers towing, fuel delivery, and lockout services, providing peace of mind during unexpected situations. Genuine Ford and Motorcraft parts are recommended for maintenance to ensure warranty validity and optimal vehicle performance. The warranty also includes information on safety defects reporting and mediation programs for dispute resolution. By understanding the terms and coverage, owners can maximize their warranty benefits and maintain their vehicle’s condition effectively.

Roadside Assistance and Support

The 2012 Ford Fusion roadside assistance program provides 24/7 support for emergencies, covering towing, fuel delivery, and lockout services. Vehicles sold in the U.S. and Canada are eligible for this coverage, ensuring help is always available. Additionally, the program includes assistance for situations like flat tires or mechanical breakdowns, offering peace of mind while on the road. For U.S. customers, the Better Business Bureau Auto Line Program is available for dispute resolution, while Canadian owners can utilize the Mediation/Arbitration Program. These resources ensure comprehensive support, helping owners address unexpected issues efficiently and maintain their vehicle’s reliability.

Accessories and Customization

The 2012 Ford Fusion offers a range of Ford-approved accessories for enhanced functionality and personal style, including interior and exterior customization options like floor mats, alloy wheels, and tech upgrades.

Ford-Approved Accessories

The 2012 Ford Fusion supports a variety of Ford-approved accessories designed to enhance functionality and personal style. These include high-quality interior additions like premium floor mats, cargo organizers, and trunk trays to protect and customize your vehicle. Exterior accessories such as alloy wheels, spoilers, and chrome accents can elevate the Fusion’s appearance. Additionally, Ford offers tech upgrades like smartphone integration kits and rearview camera systems for improved convenience and safety. All Ford-approved accessories are rigorously tested to ensure compatibility and durability, maintaining the vehicle’s performance and aesthetic appeal. These accessories allow owners to tailor their Fusion to their lifestyle while adhering to Ford’s quality standards.

Interior and Exterior Customization Options

The 2012 Ford Fusion offers a range of interior and exterior customization options to personalize your driving experience. Inside, you can choose from premium fabric or leather-trimmed seats, available in multiple colors to match your style. Additionally, options like heated seats, power-adjustable seating, and customizable ambient lighting allow for a tailored interior environment. Externally, the Fusion can be enhanced with accessories such as alloy wheels, sport body kits, and unique paint finishes. These customization options enable owners to reflect their personal preferences while maintaining the vehicle’s sleek and modern design aesthetic, ensuring a unique and satisfying ownership experience.

The 2012 Ford Fusion manual serves as a vital resource for optimizing your vehicle’s performance, safety, and longevity. By following its guidance, you can ensure a smooth and enjoyable driving experience while maintaining your car in peak condition.

Final Tips for Optimal Vehicle Performance

For the best performance, ensure proper tire inflation, regular fluid checks, and adherence to the maintenance schedule. Avoid extreme temperatures and aggressive driving. Keep your 2012 Ford Fusion in top shape by following the manual’s guidelines for fluid replacements and system checks. Regularly inspect belts, hoses, and brakes for wear. Use high-quality, Ford-approved parts for repairs. Drive smoothly, avoiding rapid acceleration and hard braking to maximize fuel efficiency. Stay informed about software updates and recalls. By following these tips, you’ll enjoy a safe, efficient, and enjoyable driving experience for years to come. Always refer to your manual for specific recommendations tailored to your vehicle.

Staying Informed About Your Vehicle

Staying informed about your 2012 Ford Fusion ensures you maximize its performance and longevity. Regularly review the owner’s manual for updates on maintenance, features, and safety systems. Check Ford’s official website for recalls, software updates, or new guidelines. Register your vehicle with Ford to receive personalized notifications and support. Use FordPass or similar apps for real-time updates and vehicle monitoring. Attend workshops or online forums to learn about new technologies and best practices. Keeping up-to-date ensures you’re always aware of the latest recommendations and improvements for your vehicle. Stay connected with Ford’s customer support for any questions or concerns about your Fusion.

boss loop station rc 3 manual

Welcome to the BOSS Loop Station RC-3, a powerful pedal-type stereo looper designed for guitarists and musicians seeking advanced looping capabilities. With up to three hours of recording time and storage for 99 loops, it offers a real drum rhythm guide and USB 2.0 compatibility, making it a versatile tool for live performances and practice sessions.

1.1 Overview of the RC-3 Loop Station

The BOSS RC-3 Loop Station is a compact, pedal-type stereo looper designed for guitarists and musicians. It offers up to three hours of recording time, storage for 99 loops, and a built-in rhythm guide with real drum patterns. The device features USB 2.0 connectivity for importing and exporting loops, making it ideal for both live performances and practice sessions. Its intuitive interface and robust features make it a versatile tool for creating and manipulating loops with ease.

1.2 Key Features of the RC-3

The RC-3 offers up to three hours of stereo recording time, 99 phrase memories, and a real drum rhythm guide with 10 rhythm patterns. It features adjustable output levels, loop effects, and USB 2.0 connectivity for importing/exporting loops. The pedal includes a display for monitoring loops and indicators for recording, playback, and overdubbing. Its compact design and intuitive controls make it ideal for live performances and practice sessions, providing musicians with a powerful tool for creative looping.

1.3 Importance of the Manual

The manual is essential for understanding the RC-3’s innovative features and functions. It provides detailed guidance on navigating the interface, recording loops, and utilizing rhythm guides. By following the manual, users can unlock the device’s full potential, customize settings, and troubleshoot common issues. This ensures seamless operation and enhances creative possibilities for live performances and practice sessions, helping musicians achieve professional-quality sound and effects with ease.

Installation and Basic Setup

This section guides you through unboxing, connecting the RC-3 to your amplifier’s clean channel, using a 9-volt battery or AC adapter, and initial configuration for smooth operation.

2.1 Unboxing and Accessories

Upon unboxing the BOSS RC-3 Loop Station, you’ll find the device itself, a user manual, a safety booklet, and a 9-volt battery for power. Ensure all items are accounted for before proceeding. The compact pedal design is ready for immediate use, with no additional accessories required for basic functionality. Refer to the manual for detailed setup instructions and safety precautions to ensure optimal performance and longevity of your Loop Station.

2.2 Connecting the RC-3 to Your Amp

To connect the BOSS RC-3 Loop Station to your amplifier, use the MONO OUTPUT jack and connect it to the clean channel of a high-quality amp, such as a Roland JC-120. For stereo output, utilize the STEREO OUTPUT jacks with a TRS cable. Ensure the amp is set to a clean channel for optimal sound quality. Power the RC-3 using the included 9-volt battery or an AC adapter. Place the pedal in your signal chain as desired, typically after your guitar and before effects pedals or the amp input.

2.3 Powering the Device

The BOSS RC-3 Loop Station can be powered using a 9-volt battery or an AC adapter (sold separately). For battery operation, install one 9-volt battery in the compartment. The device automatically enters Sleep mode after ten hours of inactivity to conserve power. To disable Sleep mode, press and hold the pedal while turning on the power and keep it held for five seconds. Ensure the battery is fresh for optimal performance during recordings and live use.

2.4 Initial Configuration

After unboxing, connect the RC-3 to your amplifier’s clean channel for optimal sound quality. Set the output level to match your amp’s input to avoid distortion. Adjust the display brightness for visibility in various lighting conditions. Activate the Rhythm Guide if desired, syncing it with your loop tempo for practice or performance. Finally, ensure all settings are saved to maintain your configuration during power cycles. If needed, reset to factory settings for a clean start.

Recording and Playback Basics

Discover the fundamentals of recording, overdubbing, and playing back audio with the RC-3. Capture up to three hours of stereo loops, store up to 99 phrases, and utilize the built-in rhythm guide for precise timing and practice.

3.1 Understanding Loop Recording

Loop recording on the BOSS RC-3 allows you to capture and replay audio phrases seamlessly. This pedal-type recorder enables guitarists and musicians to record up to three hours of stereo loops, with storage for 99 phrases. The process involves pressing the pedal to start recording, layering sounds with overdubbing, and syncing loops with the built-in rhythm guide for precise timing. The RC-3’s intuitive interface and real-time controls make it easy to manage recordings, ensuring a smooth and creative looping experience during performances or practice sessions.

3.2 Starting and Stopping Recordings

Starting and stopping recordings on the BOSS RC-3 is straightforward. Press the pedal once to begin recording, and the LED indicator will flash red to confirm recording is active. To stop, press the pedal again, and the indicator will turn solid red. This process allows seamless transitions between recording and playback. The RC-3 also supports overdubbing, enabling layering of sounds for complex loops. Use the rhythm guide to maintain timing, ensuring precise and synchronized recordings every time.

3.3 Playback Controls

The BOSS RC-3 offers intuitive playback controls for managing your loops. Once a loop is recorded, press the pedal once to start playback, indicated by a flashing LED. To stop playback, press the pedal again, and the LED will turn solid red. You can also adjust the playback level using the rhythm volume knob, ensuring your loops blend perfectly with your live performance. This feature provides seamless control over your audio, making it easy to integrate loops into your music seamlessly.

3.4 Overdubbing Techniques

Overdubbing on the BOSS RC-3 allows you to layer sounds over an existing loop. Press and hold the pedal while playing to activate overdub mode, indicated by a flashing green LED. This feature lets you add harmonies, rhythms, or solos to your loop. Adjust the Loop Level knob to balance the volumes of the original and overdubbed layers. Overdubbing enhances your creative possibilities, enabling complex soundscapes and dynamic performances. Experiment with timing and layering to achieve professional-quality loops effortlessly.

Rhythm Guide and Timing

The BOSS RC-3 features a built-in rhythm guide with real drum patterns to help you maintain precise timing. Adjust the rhythm volume to match your loops, ensuring synchronized playback. This tool is ideal for practice and live performances, allowing you to create perfectly timed loops and enhance your musical expression with ease and accuracy.

4.1 Activating the Rhythm Guide

To activate the rhythm guide on the BOSS RC-3, press and hold the RITM GUIDE button until the indicator lights up. This engages the built-in drum patterns, providing a rhythmic foundation for your loops. You can choose from various genres and time signatures to match your music. The rhythm guide is ideal for practicing timing or adding structure to your performances. Use the LEVEL knob to adjust the volume of the rhythm relative to your loops, ensuring a balanced sound during playback.

4.2 Adjusting Rhythm Volume

Adjust the rhythm guide volume using the RHYTHM LEVEL knob located on the RC-3’s control panel. This allows you to balance the rhythm audio with your looped phrases during playback. Turning the knob clockwise increases the rhythm volume, while counterclockwise decreases it. The rhythm guide remains synchronized with your loops, ensuring a cohesive sound. This feature is particularly useful for maintaining a steady beat during practice or live performances, enhancing your overall musical expression and timing accuracy.

4.3 Syncing Loops with Rhythms

To sync loops with rhythms on the BOSS RC-3, engage the rhythm guide by pressing the RHYTHM ON/OFF button. The device automatically synchronizes your recorded loops with the selected rhythm pattern, ensuring seamless timing. This feature is ideal for maintaining a consistent tempo during live performances or practice sessions. Use the RHYTHM LEVEL knob to adjust the volume balance between your loops and the rhythm guide, creating a cohesive and professional sound. This synchronization enhances your musical expression and timing accuracy.

4.4 Using Rhythm for Practice

The BOSS RC-3’s rhythm guide is an excellent tool for practice, providing a metronome and drum patterns to help improve timing and consistency. Activate the rhythm by pressing the RHYTHM ON/OFF button and adjust the RHYTHM LEVEL to balance the volume with your loops. This feature is ideal for rehearsing complex phrases or maintaining a steady tempo, making it a valuable aid for both beginners and experienced musicians seeking to refine their skills.

Understanding the Display and Indicators

The RC-3 features an LCD display showing loop numbers, memory locations, and recording time. Indicators like LOOP, RHYTHM, and REC provide visual feedback during operations, ensuring easy monitoring of the device’s status.

5.1 Reading the LCD Display

The RC-3’s LCD display provides essential information at a glance, including loop numbers, memory locations, and remaining recording time. The screen also shows real-time feedback during recording, playback, and overdubbing. Indicators like LOOP, RHYTHM, and REC illuminate or flash to signal the device’s current mode or action. Understanding these visual cues is crucial for seamless operation, allowing you to navigate and control your loops efficiently. The display’s clarity ensures intuitive operation, even during live performances or practice sessions.

5.2 Understanding Indicator Lights

The RC-3 features indicator lights that provide visual feedback during operation. The LOOP indicator spins rapidly during recording and blinks during playback. The RHYTHM indicator lights up when the rhythm guide is active, while the REC indicator flashes during recording. These lights help you monitor the device’s status and mode. Pressing the pedal twice changes the display mode, offering additional operational insights. Understanding these indicators is key to navigating the RC-3’s functions smoothly during performances or practice sessions.

5.3 Status Indications During Operation

The RC-3’s LCD display and indicators provide real-time status updates. The display shows the current loop number, volume levels, and rhythm settings. The LOOP indicator spins during recording and blinks during playback. The RHYTHM indicator lights up when the rhythm guide is active. Pressing the pedal twice changes the display mode, showing additional details like loop length or rhythm type. The device also enters Sleep mode after ten hours of inactivity, conserving power. These indicators ensure intuitive monitoring and control of your looping sessions.

Advanced Features and Customization

The RC-3 offers advanced features like loop effects, customizable settings, and USB connectivity for expanded creativity and control over your looping experience.

6.1 Using the Loop Effects

The RC-3 features a variety of loop effects to enhance your performances. Effects such as Reverse and Loop-Slice allow for creative manipulation of your recorded phrases. These effects can be applied during playback to create unique textures and layers, adding depth to your music. With the ability to pan loops and adjust levels, you can craft complex soundscapes. Experimenting with these effects opens up new possibilities for live performances and studio work, making the RC-3 a versatile tool for musicians.

6.2 Adjusting Output Levels

The RC-3 allows precise control over output levels to optimize your sound. Use the OUTPUT LEVEL knob to adjust the overall volume of your loops. Additionally, the RHYTHM VOLUME knob lets you balance the rhythm guide with your loops. These adjustments ensure your sound is well-balanced and tailored to your performance needs. The LCD display provides visual feedback, helping you fine-tune levels for the best audio quality. Proper level adjustment is key to achieving professional-grade sound in both live and studio settings.

6.3 Customizing the RC-3 Settings

The RC-3 offers extensive customization options to tailor its operation to your needs; You can adjust the OUTPUT LEVEL and RHYTHM VOLUME to balance your sound perfectly. Additionally, the device allows you to customize the LOOP EFFECTS and PLAYBACK SETTINGS for enhanced creativity. Users can also enable or disable the RHYTHM GUIDE and adjust its timing to sync with your loops seamlessly. These settings ensure a personalized experience, making the RC-3 adaptable to various musical styles and preferences.

6.4 Exploring the USB Connectivity

The RC-3 features USB 2.0 compatibility, enabling seamless connectivity to your computer for transferring loops and importing new audio content. This functionality allows you to organize and manage your loops efficiently, enhancing your creative workflow. Additionally, the USB connection supports firmware updates, ensuring your device stays up-to-date with the latest features and improvements. By connecting the RC-3 to your computer, you can expand its capabilities and integrate it into your digital music setup effortlessly.

Troubleshooting Common Issues

Addressing power issues, audio playback problems, and connectivity concerns ensures optimal performance. Resetting the RC-3 can resolve software-related issues, restoring default settings for reliable operation.

7.1 Resolving Power Issues

Ensure the RC-3 is properly powered using a 9-volt battery or DC adapter. If the device enters Sleep mode, press and hold the pedal for 5 seconds to deactivate it. Resetting the unit by pressing and holding the pedal while powering on can resolve persistent power-related issues. Always use a compatible power supply to avoid malfunctions and ensure stable operation during performances or recording sessions.

7.2 Fixing Audio Playback Problems

If experiencing no sound or distorted audio, ensure the volume levels are properly adjusted and connections are secure. Restart the device to resolve software glitches. Clean the input/output jacks to eliminate interference. Ensure the latest firmware is installed for optimal performance. If issues persist, reset the RC-3 by pressing and holding the pedal while powering on; This restores default settings and often resolves playback-related problems effectively.

7.3 Addressing Connectivity Problems

To resolve connectivity issues, ensure all cables are securely connected and undamaged. Verify the USB connection by using the provided cable and installing the latest drivers from the BOSS website. Restart the RC-3 and your computer to establish a fresh connection. If problems persist, check the USB port functionality and ensure the device is properly recognized by your system. Update the firmware to the latest version for optimal connectivity and performance.

7.4 Resetting the RC-3

To reset the RC-3 to its factory settings, press and hold the pedal while turning on the power. Keep holding the pedal for 5 seconds until the display shows “RESET.” This will restore all settings to their default values. Note that this process will erase all stored loops and customized settings. For detailed instructions, refer to the manual or visit the official BOSS support website. Regular resets can help resolve persistent operational issues or prepare the device for a fresh setup.

Maintenance and Care Tips

Regularly clean the RC-3 with a soft cloth and avoid harsh chemicals. Update firmware periodically for optimal performance and store the device in a dry, cool place to ensure longevity and functionality.

8.1 Cleaning the RC-3

Regular cleaning ensures optimal performance and longevity. Use a soft, dry cloth to gently wipe the exterior and pedals, removing dirt and dust. Avoid harsh chemicals or abrasive materials that may damage the finish. For the LCD display, lightly dampen a microfiber cloth with water and carefully wipe away smudges. Never soak the cloth or allow moisture to seep into openings. This routine maintenance prevents wear and keeps your RC-3 functioning and looking like new.

8.2 Updating Firmware

To ensure optimal performance, regularly update the RC-3 firmware. Download the latest version from the official BOSS website. Connect the RC-3 to your computer via USB and use the BOSS Tone Studio app to perform the update. Backup your loops before proceeding, as the process may erase stored data. Follow on-screen instructions carefully and avoid interrupting the update. Once complete, restart the device to apply changes. This ensures access to new features, bug fixes, and improved functionality.

8.3 Storing the Device Properly

Store the RC-3 in a protective casing or bag to prevent scratches and damage. Keep it in a cool, dry environment, avoiding extreme temperatures and humidity. Avoid direct sunlight, as it may cause discoloration or internal damage. Remove batteries if storing for extended periods to prevent leakage. Use the AC adapter for power if storing near an electrical source. Ensure the device is turned off to conserve energy and maintain its longevity. Proper storage ensures the RC-3 remains functional and ready for use whenever needed.

The BOSS RC-3 Loop Station is a versatile and powerful tool, offering endless creative possibilities. Regular updates ensure optimal performance, making it an essential addition for musicians seeking to enhance their looping capabilities.

9.1 Summary of Key Features

The BOSS RC-3 Loop Station offers up to three hours of stereo recording, storage for 99 loops, and a real drum rhythm guide. Its USB 2.0 compatibility allows easy transfer of audio files to and from your computer. The pedal features a user-friendly interface with a LCD display, rhythm volume control, and overdubbing capabilities. These features make it an ideal tool for musicians seeking to enhance their live performances and practice sessions with advanced looping functionality.

9.2 Encouragement for Creative Use

Unleash your creativity with the BOSS RC-3 Loop Station by experimenting with layers, rhythms, and overdubs. Whether building intricate soundscapes or crafting dynamic live performances, this tool empowers musicians to explore new sonic possibilities. Its intuitive design and robust features invite artists to push boundaries, making it an indispensable companion for both composition and live expression. Embrace the versatility of the RC-3 and let your imagination shape unique musical experiences.

9.3 Importance of Regular Updates

Regular firmware updates are essential to ensure the BOSS RC-3 Loop Station performs optimally. Updates often include bug fixes, improved functionality, and new features that enhance your looping experience. Staying current with the latest software ensures compatibility with other devices and maintains seamless operation. By periodically checking for updates, you can unlock the full potential of your RC-3 and enjoy a more efficient, feature-rich looping experience. Always refer to the official BOSS support website for the most recent updates and installation instructions.

Additional Resources

Explore official BOSS support, community forums, and tutorial videos for in-depth guidance and troubleshooting. These resources enhance your RC-3 experience and resolve common issues effectively.

10.1 Official BOSS Support

The BOSS official website provides comprehensive support for the RC-3, featuring downloadable manuals, troubleshooting guides, and firmware updates. Users can access detailed documentation, FAQ sections, and customer support contact options for resolving issues. This ensures optimal performance and addresses concerns effectively, helping users maximize their RC-3 experience.

10.2 Community Forums

Community forums dedicated to the BOSS RC-3 Loop Station offer valuable peer-to-peer support and discussions. Musicians and producers share tips, troubleshooting solutions, and creative techniques for maximizing the device’s potential. These forums are an excellent resource for learning from experienced users, gaining insights into advanced features, and staying updated on best practices. Active engagement in these communities can enhance your workflow and inspire new approaches to looping and music production.

10.3 Tutorial Videos

Tutorial videos are an excellent resource for mastering the BOSS RC-3 Loop Station. Available on official BOSS channels, YouTube, and music gear websites, these videos provide step-by-step guides, tips, and tricks for optimizing the device. From basic setup to advanced looping techniques, they cover it all. Whether you’re a beginner or an experienced musician, these tutorials offer practical insights to enhance your creative workflow and troubleshoot common issues effectively.

singer sewing machine 9410 manual

The Singer 9410 manual is your ultimate guide to mastering this versatile sewing machine, designed for both beginners and experienced sewists.
It provides detailed instructions for setup, operation, and maintenance, ensuring optimal performance and creativity in your sewing projects.

With comprehensive coverage of features, troubleshooting, and advanced techniques, this manual is indispensable for unlocking the full potential of your Singer 9410 sewing machine.

Overview of the Singer 9410 Sewing Machine

The Singer 9410 sewing machine is a versatile and feature-rich model designed for a wide range of sewing projects. It offers advanced stitching options, automatic threading, and user-friendly controls, making it ideal for both beginners and experienced sewists. The machine is known for its durability and precision, allowing for consistent results across various fabrics and techniques. With its comprehensive design, the Singer 9410 is a popular choice for those looking to explore creative sewing while maintaining professional-quality outcomes.

Available as a downloadable PDF or physical CD, the Singer 9410 manual provides detailed guidance, ensuring users can fully utilize its capabilities. It covers troubleshooting, maintenance, and operation, making it an essential resource for anyone owning this machine.

Importance of the Manual for Effective Usage

The Singer 9410 manual is essential for optimal performance and understanding the machine’s features. It provides step-by-step guides for setup, operation, and maintenance, ensuring users can maximize their sewing experience.
Without the manual, users may miss out on advanced functions and troubleshooting tips, which are crucial for resolving common issues and extending the machine’s lifespan.

Whether you’re a beginner or an experienced sewist, the manual serves as a comprehensive resource, helping you navigate the machine’s capabilities confidently and efficiently. It ensures safe and effective usage, making it indispensable for achieving professional-quality results.

Key Features of the Singer 9410 Covered in the Manual

The Singer 9410 manual highlights the machine’s advanced features, including multiple stitch options, automatic needle threading, and customizable settings for various fabrics.
It also details the use of optional feet and accessories, enhancing versatility for projects like embroidery, quilting, and heavy-duty sewing.

Understanding these features through the manual ensures users can leverage the machine’s full potential, from basic repairs to intricate designs, making it a valuable resource for sewists of all skill levels.

Setting Up Your Singer 9410 Sewing Machine

Setting up your Singer 9410 involves unboxing, assembling, and preparing the machine for use.
The manual provides clear guidance to ensure a smooth and efficient setup process.

Unboxing and Initial Setup

Unboxing the Singer 9410 reveals a sleek, feature-rich sewing machine.
Begin by carefully removing all components, including the machine, accessories, and instruction manual, from the packaging.
Inspect each item for damage and ensure all parts are included.
Next, place the machine on a stable, flat surface, such as a sewing table or countertop.
Locate the power cord and plug it into a nearby electrical outlet.
Before turning it on, review the manual’s setup section to familiarize yourself with the machine’s layout and basic functions.
This initial setup ensures a smooth start to your sewing journey.

Basic Machine Assembly and Preparation

Begin by attaching the sewing head to the free-arm base, ensuring a secure connection.
Next, install the bobbin case and thread take-up lever according to the manual’s instructions.
Apply a few drops of Singer-recommended oil to the machine’s moving parts to ensure smooth operation.
Gently turn the handwheel to distribute the oil evenly.
Now, insert the bobbin through the bobbin case and pull the thread to prepare for sewing.
Finally, test the machine by sewing a few straight stitches on scrap fabric to ensure everything is functioning correctly.

Understanding the Control Panel and Dials

The control panel of the Singer 9410 features a user-friendly interface with a stitch selection dial, stitch length, and width adjustment dials.
The stitch selection dial allows you to choose from various stitch types, including straight, zigzag, and decorative stitches.
The stitch length dial adjusts the length of your stitches, while the width dial controls the zigzag stitch width.
Additional buttons include the reverse stitch lever for securing seams and the automatic needle threader activation.
Refer to the manual for detailed explanations of each icon and symbol to optimize your sewing experience.
Experiment with different settings to achieve the desired results for your projects.

Operating the Singer 9410 Sewing Machine

Operating the Singer 9410 is smooth and intuitive, with features like automatic threading and stitch selection.
It offers precise control over stitch length, width, and speed, ensuring professional results for various fabrics and projects.
The manual provides clear guidance on optimizing these features for seamless sewing experiences.

Selecting the Right Stitch for Your Project

Selecting the right stitch is crucial for achieving professional results with your Singer 9410.
The machine offers a variety of stitches, including straight, zigzag, and decorative options, each suited for specific fabrics and tasks.
For instance, the straight stitch is ideal for lightweight materials, while the zigzag stitch is perfect for preventing fraying on woven fabrics.
Decorative stitches add elegance to your projects, making them great for embellishments.
The manual provides a detailed stitch chart, helping you choose the perfect option for your sewing needs.
Always test the stitch on scrap fabric before starting your project to ensure the best results.

Threading the Machine: A Step-by-Step Guide

To thread your Singer 9410 sewing machine, start by turning it off and locating the spool pin.
Take the thread end and insert it into the tension disc, gently guiding it through the machine’s tension guides.
Next, pass the thread through the uptake lever and down to the needle.
Use the automatic needle threader for ease, or manually insert the thread into the needle’s eye.
Gently pull the thread to remove any slack and ensure it’s seated properly.
Finally, trim the excess thread and test by sewing on scrap fabric to ensure smooth operation.

Using the Automatic Needle Threader

The Singer 9410 features an automatic needle threader, simplifying the threading process.
First, raise the needle to its highest position and engage the threader by pulling it towards you.
Insert the thread into the threader’s guide, ensuring it aligns properly.
Gently pull the threader handle to thread the needle automatically.
Once threaded, release the handle and pull the thread to secure it.
This convenient feature saves time and effort, especially for those with less dexterity.
Always refer to the manual for visual guidance to ensure proper use of this feature.

Maintenance and Troubleshooting

Regular maintenance and troubleshooting are essential for optimal performance. The manual provides guidelines for cleaning, oiling, and diagnosing common issues to ensure smooth operation.

Cleaning and Oiling the Machine

Regular cleaning and oiling are crucial for maintaining the Singer 9410’s performance. Turn off the machine and unplug it before starting. Use a soft brush or cloth to remove dust and debris from the exterior and internal components. Pay special attention to the bobbin area and tension discs, as these can accumulate lint. Apply a few drops of high-quality sewing machine oil to moving parts, such as the needle bar and hook race. Refer to the manual for specific oiling points and frequency recommendations to ensure smooth operation and extend the machine’s lifespan.

Troubleshooting Common Issues

Troubleshooting the Singer 9410 involves identifying symptoms and addressing root causes. Common issues include uneven stitching, thread breakage, or the machine not sewing. Start by checking thread tension, ensuring it’s balanced for the fabric type. Verify the bobbin is properly aligned and seated. If the machine is noisy, inspect for lint buildup or misaligned parts. Consult the manual for specific diagnostic steps and solutions. Experiment with settings to find the right combination for your project. Regular maintenance, like cleaning and oiling, can prevent many issues. If problems persist, refer to the manual or contact Singer support for assistance.

Resolving Errors and Resetting the Machine

Resolving errors on the Singer 9410 involves addressing specific issues like error codes or malfunctioning parts. Refer to the manual for explanations of error codes, which guide you to solutions. To reset the machine, turn it off, unplug it, and wait a few minutes before restarting. This often resolves software-related glitches. For mechanical issues, ensure all parts are properly aligned and clean. Regular maintenance, such as cleaning and oiling, can prevent errors. If problems persist, consult the troubleshooting section or contact Singer support for professional assistance to restore optimal performance.

Accessories and Additional Features

The Singer 9410 manual details compatible accessories like optional feet and additional parts, enhancing versatility for various sewing tasks. It also includes guides for upgrading or replacing components, ensuring optimal performance and customization for your projects.

Compatible Accessories for the Singer 9410

The Singer 9410 manual highlights a variety of compatible accessories, including specialized presser feet for tasks like quilting, embroidery, and heavy-duty sewing.
These accessories enhance the machine’s versatility, allowing users to tackle diverse projects with precision and ease.
Additionally, the manual provides information on optional parts and attachments, such as extension tables and bobbin cases, which can further customize your sewing experience.
By utilizing these accessories, sewists can expand their creative possibilities and achieve professional-quality results.

Optional Feet and Their Uses

The Singer 9410 manual introduces a range of optional presser feet designed to enhance your sewing experience.
From the quilting foot for precise fabric control to the zipper foot for seamless zipper installation, these accessories cater to specific tasks.
The walking foot is ideal for heavy or thick fabrics, while the blind hem foot simplifies hemming.
Each foot is tailored to optimize performance for particular projects, allowing users to achieve professional results.
Refer to the manual for detailed descriptions and compatibility, ensuring the best fit for your sewing needs.

Upgrading or Replacing Parts

The Singer 9410 manual provides guidance on upgrading or replacing parts to maintain or enhance machine performance.
Whether it’s replacing the bobbin case, feed dogs, or other components, the manual offers step-by-step instructions;
Users can find compatible parts through Singer-approved dealers or online retailers, ensuring authenticity and functionality.
Before making any changes, consult the manual to verify compatibility and proper installation procedures.
Regular maintenance and timely replacements can extend the machine’s lifespan and ensure optimal sewing results.

Advanced Sewing Techniques

Explore advanced sewing techniques with the Singer 9410, including custom stitch patterns and fabric-specific settings.
Master intricate designs and specialized stitching for professional-grade results, enhancing your sewing projects with precision and creativity.

Maximizing the Potential of Your Singer 9410

To fully utilize your Singer 9410, explore its advanced features and capabilities outlined in the manual.
From custom stitch patterns to specialized settings, the manual guides you in tailoring your sewing experience to various fabrics and projects.
Leverage the detailed instructions to experiment with intricate designs and troubleshooting tips for seamless operation.
By mastering these techniques, you can unlock the machine’s full potential, ensuring professional-grade results and a satisfying sewing experience.

Customizing Settings for Specific Fabrics

The Singer 9410 manual provides detailed guidance on adjusting machine settings for various fabrics, ensuring optimal sewing results.
Learn how to modify tension, stitch length, and width to suit different materials, from delicate silks to heavy canvases.
The manual emphasizes the importance of test sewing on scrap fabric to achieve the perfect balance for your project.
By following these customization tips, you can enhance the quality of your stitches and adapt the machine to your specific sewing needs, making every project a success.

Advanced Stitch Patterns and Applications

The Singer 9410 manual introduces users to advanced stitch patterns, perfect for intricate sewing projects.
With over 100 built-in stitches, including decorative, stretch, and quilting options, the machine offers versatility for any fabric type.
Learn how to layer stitches, combine patterns, and adjust settings for unique effects.
The manual guides you through techniques like embroidery, appliqué, and heavy-duty sewing, ensuring professional results.
By mastering these advanced features, you can create complex designs, from home décor to custom clothing, making the Singer 9410 a powerful tool for creative expression.

Mastery of the Singer 9410 is achieved through practice and adherence to the manual’s guidance.
Unlock its full potential to create stunning, professional-quality projects with confidence and precision.

Final Tips for Optimal Performance

For the Singer 9410, regular maintenance is key to optimal performance. Clean and oil the machine frequently to prevent dust buildup and ensure smooth operation.
Always use high-quality threads and needles suitable for your fabric type to avoid breakage and uneven stitching.
Experiment with different stitch settings and fabric customizations to enhance your sewing experience.
Consult the manual for troubleshooting common issues and resetting the machine when necessary.
By following these tips, you’ll extend the life of your Singer 9410 and achieve professional-grade results in all your sewing projects.

wow cata prot paladin guide

Protection Paladins in World of Warcraft: Cataclysm are formidable tanks, combining holy magic with martial prowess to safeguard allies․ With plate armor and powerful defensive abilities, they excel at absorbing damage and controlling enemy aggression, making them indispensable in raids and dungeons․ Their unique blend of strength, stamina, and divine protection ensures they remain at the forefront of any battle, safeguarding their party while upholding the principles of the Holy Light․

1․1․ Overview of the Protection Paladin Role

As a Protection Paladin in World of Warcraft: Cataclysm, your primary role is to act as a steadfast tank, ensuring enemy aggression is focused on you while protecting your allies․ Utilizing a mix of holy and martial abilities, you absorb damage, control mobs, and maintain threat․ Your plate armor, defensive cooldowns, and healing synergy make you a resilient and reliable shield for your party, essential for success in dungeons and raids․

1․2․ Importance of Tanking in WoW Cataclysm

Tanking in World of Warcraft: Cataclysm is crucial for group success, especially in challenging dungeons and raids; Protection Paladins are essential for maintaining threat and ensuring enemies focus on them, protecting weaker allies․ Without effective tanking, healers and DPS are at risk, making the tank’s role vital for progression and victory․

Stats and Priorities for Prot Paladins

Understanding stats is vital for Protection Paladins․ Strength and Agility are primary, while Stamina, Dodge, and Parry are critical for survivability․ Balancing these ensures optimal tanking performance in Cataclysm․

2․1; Primary Stats: Strength and Agility

Strength and Agility are the cornerstone stats for Protection Paladins․ Strength increases attack power and block value, crucial for generating threat and mitigating damage․ Agility enhances dodge chance, improving survivability․ Balancing these stats ensures effective tanking, as Strength boosts offensive capabilities while Agility refines defensive evasion․ Together, they form the foundation of a Prot Paladin’s effectiveness in Cataclysm․

2․2․ Secondary Stats: Stamina, Dodge, and Parry

Stamina boosts health, enhancing survivability, while Dodge and Parry increase avoidance, reducing incoming damage․ These stats are critical for tanking, as they improve endurance and mitigate enemy attacks․ Balancing Stamina for health and Dodge/Parry for avoidance ensures Protection Paladins can withstand prolonged encounters․ Together, these stats enhance overall tanking effectiveness in Cataclysm, making them indispensable for a sturdy defensive setup․

2․3․ Reforging Guide for Optimal Tanking

Reforging allows Prot Paladins to optimize gear by converting less desirable stats into valuable ones․ Prioritize reforging parry to dodge for better avoidance balance and convert excess hit or crit to mastery for increased block․ Always aim to maintain a balance between stamina, dodge, and parry while ensuring mastery is appropriately elevated to enhance block effectiveness, ensuring maximum survivability in raids and dungeons․

Talent Build and Glyphs

A well-structured talent build and glyphs are crucial for Prot Paladins, enhancing survivability, threat generation, and divine protection․ They form the foundation of a tank’s effectiveness in Cataclysm․

3․1․ Recommended Talent Build for Tanking

A Prot Paladin’s talent build focuses on maximizing survivability and threat generation․ Key talents include Divine Strength, Hammer of the Righteous, and Shield of the Templar, which enhance damage reduction and holy damage․ Reckoning and Grand Crusader improve weapon swings and burst damage, while Divine Guardian and Guarded by the Light bolster defensive capabilities․ This build ensures a balance of threat, survivability, and divine protection, making Paladins resilient tanks in any situation․

3․2․ Major and Minor Glyphs for Prot Paladins

Prot Paladins benefit from glyphs that enhance defensive and offensive capabilities․ Major glyphs like Glyph of Shield of the Righteous and Glyph of Hammer of the Righteous boost damage and threat generation․ Glyph of Word of Glory increases healing from the ability․ Minor glyphs such as Glyph of Lay on Hands and Glyph of Blessing of Kings provide utility, enhancing survivability and group support․ These glyphs optimize a Paladin’s tanking performance and versatility in raids and dungeons․

Core Abilities and Rotations

Prot Paladins rely on core abilities like Shield of the Righteous and Hammer of the Righteous for damage mitigation and threat generation․ Their rotation focuses on maintaining these buffs while using Judgement and Cleanse to control enemies and reduce debuffs, ensuring a balanced and effective tanking strategy․

4․1․ Key Abilities for Tanking

Prot Paladins utilize a mix of offensive and defensive abilities to excel in tanking․ Core spells include Judgement for generating threat, Shield of the Righteous for damage mitigation, and Hammer of the Righteous for AoE threat․ Holy Wrath helps control undead enemies, while Consecrate and Cleanse provide area denial and debuff removal․ Lay on Hands serves as an emergency heal, making these abilities essential for effective tanking in any situation․

4․2․ Basic and Advanced Rotation Techniques

Begin with a basic rotation of Judgement for threat and Shield of the Righteous for damage absorption․ Use Consecrate to maintain AoE threat․ Advanced techniques involve optimizing cooldowns like Holy Power for Word of Glory and Templar’s Verdict․ Incorporate Aura Mastery for group benefits and balance offensive/defensive cooldowns to enhance survivability and threat generation seamlessly․

Gearing Your Prot Paladin

Gearing your Prot Paladin is crucial for effective tanking in Cataclysm․ Focus on collecting epic gear from dungeons and raids, prioritizing Strength, Stamina, and Dodge․ Enchants and gems further enhance your tanking capabilities, ensuring optimal performance in challenging encounters․

5․1․ Pre-Raid Gear and Where to Find It

Acquiring pre-raid gear is essential for new Prot Paladins in Cataclysm․ Focus on dungeon drops from heroic instances like Throne of the Tides and The Stonecore․ Crafted items, such as Ebonsteel gear, and reputation rewards from factions like Guardians of Hyjal also provide solid starting pieces․ Prioritize Strength, Stamina, and Dodge to build a strong foundation for tanking in later content․

5․2․ Raid Gear Progression in Cataclysm

Prot Paladins progress through Cataclysm’s raid tiers by upgrading gear in Tier 11 (e․g․, Blackwing Descent), Tier 12 (Firelands), and Tier 13 (Dragon Soul)․ Each tier offers improved Strength, Stamina, and avoidance stats․ Focus on set bonuses and ilvl upgrades to enhance survivability and threat generation․ Utilize Valor Points from raids and heroics to supplement gear progression and ensure optimal performance in challenging encounters․

Enchants and Gems for Prot Paladins

Enchants and gems significantly enhance a Prot Paladin’s survivability and threat generation․ Prioritize Stamina, Strength, and Dodge/Parry gems, while applying defensive enchants like Heirloom or PvP enchants for added resilience․

6․1․ Best Enchants for Tanking Gear

Enchants are crucial for maximizing a Prot Paladin’s effectiveness․ Prioritize Stamina enchants for enhanced survivability, while Strength enchants boost threat generation․ Apply Speed to boots for improved mobility, and Armor or Dodge to other pieces for added defense․ Consider Spell Resistance for specific encounters․ These enchants ensure optimal performance in raids and dungeons, making your Paladin a formidable tank․

6․2․ Gemming Strategy for Optimal Performance

Stamina is the top priority for Prot Paladins, as it increases survivability․ Strength gems are secondary for threat generation, while dodge and parry enhance avoidance․ Expertise gems help maintain consistent threat through reduced miss chances․ Meta gems like Austere or Eternal provide additional stamina or armor, further bolstering survivability․ This gemming approach ensures a balance between stamina, strength, and avoidance, optimizing your tanking performance in raids and dungeons․

Gameplay Mechanics and Tips

Mastering Protection Paladin mechanics involves precise ability usage, optimal positioning, and maintaining threat․ Effective cooldown management and awareness of enemy movements ensure superior survivability and controlled encounters․

7․1․ Basic Tanking Mechanics

Basic tanking mechanics for Protection Paladins involve generating and maintaining threat, using Taunt to control adds, and positioning enemies to minimize damage taken․ Keeping Righteous Fury active is crucial for threat generation, while abilities like Shield of the Righteous and Hammer of the Righteous help maintain aggro․ Properly managing mob facing and using area-of-effect spells to control groups ensures smooth combat flow and reduces damage to the party․

7․2․ Advanced Tips for Managing Threat and Aggro

Advanced threat management involves preemptive taunting, intelligent cooldown usage, and coordinating with DPS players․ Using Avenger’s Shield and Hand of Protection strategically can prevent aggro loss․ Communicating with your team to delay high-damage abilities ensures smooth transitions․ Additionally, positioning yourself to maximize Hammer of the Righteous and Shield of the Righteous impact helps maintain a stable threat lead, minimizing wipes and improving raid efficiency․

Managing Cooldowns

Managing cooldowns is critical for survival and threat generation․ Proper timing of abilities like Avenger’s Shield and Shield of the Righteous ensures consistent damage intake and aggro control, enhancing raid success․

8․1․ Understanding and Using Defensive Cooldowns

Defensive cooldowns are vital for survival in high-pressure situations․ Abilities like Ardent Defender and Divine Protection significantly reduce damage taken, while Lay on Hands provides an emergency heal․ Understanding when to use these tools is key to minimizing damage spikes and preventing fatalities․ Proper timing ensures optimal protection, allowing healers to maintain their rhythm and keep the tank alive during intense encounters․

8․2․ Rotation of Cooldowns for Maximum Survival

Rotating defensive cooldowns effectively is crucial for survival․ Use Ardent Defender during high damage phases, Divine Protection to reduce magical damage, and Lay on Hands for emergencies․ Alternate Hand of Sacrifice with other cooldowns to maintain consistent damage reduction․ Timing these abilities with healer cooldowns ensures optimal survivability, allowing you to withstand even the most intense encounters in Cataclysm content․

Group and Raid Dynamics

Effective group and raid dynamics hinge on clear communication and coordination․ As a tank, maintaining order, directing focus, and ensuring teamwork are paramount for success․ Healers, DPS, and the tank must synergize seamlessly, with the tank setting the pace and making strategic decisions to ensure smooth execution of encounters and optimal group performance․

9․1․ Working with Healers and DPS

Coordination with healers and DPS is crucial for success․ Prot Paladins must ensure healers can focus on their roles by maintaining threat and providing consistent, predictable damage intake․ Communicating enemy movements and utilizing abilities like Reckoning and Inquisition to maintain aggro helps DPS focus on dealing damage․ Proper positioning of enemies ensures AoE attacks maximize effectiveness, while healers can concentrate on keeping the group alive, fostering a harmonious and efficient party dynamic․

9․2․ Communication and Leadership as a Tank

Effective communication and leadership are vital for Prot Paladins․ Clearly marking targets, coordinating cooldowns, and directing movement are essential․ Calling out incoming adds, sharing strategies, and adjusting tactics during encounters ensures a unified team effort․ A tank’s leadership fosters trust and confidence, enabling healers and DPS to perform optimally, while maintaining situational awareness and adaptability to dynamic challenges ensures smooth progression and success in raids and dungeons․

Addons and Tools for Prot Paladins

Essential addons like healbot, Omen, and Deadly Boss Mods enhance tanking efficiency․ Power Auras helps track abilities, while Recount analyzes performance, ensuring optimal gameplay and situational awareness in raids and dungeons․

10․1․ Essential Addons for Tanking

For Prot Paladins, essential addons include Omen for threat tracking, Deadly Boss Mods for encounter alerts, and Power Auras to monitor key abilities․ TankSpot improves threat management, while healbot helps coordinate with healers․ Additionally, Recount provides detailed damage and threat analytics, ensuring optimal performance․ These tools enhance situational awareness, improve reaction time, and streamline communication, making them indispensable for effective tanking in both raids and dungeons․

10․2․ Customizing Your UI for Optimal Performance

Customizing your UI is crucial for effective tanking․ Move action bars and place health/mana frames near your character for quick access; Use Bartender to organize abilities and X-Perl for raid frames․ Ensure cooldowns and buffs are visible with Power Auras․ Minimize screen clutter and set up visual alerts for key abilities like Word of Glory or Lay on Hands․ A clean, functional UI enhances situational awareness and reaction speed, improving overall performance in raids and dungeons․

Common Mistakes to Avoid

New Prot Paladins often neglect mana management, overpull enemies, or ignore cooldowns․ Avoid poor spell prioritization and ensure proper positioning to reduce unnecessary damage intake during encounters․

11․1․ Frequently Made Errors by New Tanks

New Prot Paladins often struggle with overpulling mobs, neglecting cooldowns, and poor positioning․ They may forget to manage mana efficiently, leading to reduced healing throughput․ Additionally, failing to communicate with the group or ignoring threat management can result in lost aggro․ Many also overlook the importance of maintaining a proper rotation, which can diminish survivability and threat generation․ Learning from these mistakes is crucial for improvement․

11․2․ How to Improve and Become a Better Tank

To improve as a Prot Paladin, focus on consistent practice and learning from mistakes․ Start by mastering your rotation and cooldowns in low-pressure environments․ Communicate clearly with your healer and DPS to coordinate strategies․ Analyze combat logs to identify and correct errors․ Watch experienced tanks and adapt their techniques to your playstyle․ Stay calm under pressure and always prioritize survival and threat management․

Raid Tier Overview (T11-T13)

Raid Tier 11 introduces Blackwing Descent, Throne of the Tides, and Bastion of Twilight, while Tier 12 focuses on the Firelands and Tier 13 concludes with Dragon Soul․ Each tier offers unique challenges and gear progression, testing a Prot Paladin’s defensive capabilities and cooldown management in epic encounters against Cataclysm’s formidable raid bosses․

12․1․ Tier 11: The Firelands and Beyond

Tier 11 introduces Blackwing Descent, Throne of the Tides, and Bastion of Twilight, featuring iconic bosses like Cho’gall and Nefarian․ The Firelands, a part of Tier 12, presents Ragnaros and Alysrazor, challenging Prot Paladins with intense melee and magical encounters․ These raids require precise cooldown management, strong threat generation, and mastery of defensive mechanics; Loot from these tiers includes powerful tanking gear, enhancing survivability and preparing Paladins for later content․

12․2․ Tier 12 and Tier 13: Final Challenges

Tier 12, the Firelands, introduces challenging encounters like Ragnaros and Alysrazor, requiring precise cooldown management and strong situational awareness․ Tier 13, Dragon Soul, culminates in a showdown with Deathwing, featuring complex mechanics like add management and burst damage․ Both tiers demand mastery of Prot Paladin abilities, offering epic gear rewards that refine tanking capabilities for the final battles of Cataclysm․

Mastering the Protection Paladin in Cataclysm requires skill, dedication, and a deep understanding of class mechanics․ By following this guide, players can excel as resilient tanks, leading their groups to victory while embodying the noble spirit of the Paladin․

13․1․ Summary of Key Points

Protection Paladins in Cataclysm excel as tanks through mastery of stats, talents, and rotations․ Prioritizing strength, stamina, and defensive stats ensures survivability, while abilities like Shield of the Righteous and Holy Power enhance performance․ Gearing through dungeons, raids, and crafted items is essential, with enchants and gems optimizing tanking effectiveness․ Understanding cooldown management and threat generation is vital for success․ Mastery of these elements ensures a Prot Paladin becomes an indispensable asset to any group or raid․

13․2․ Encouragement and Motivation for Prot Paladins

Embrace your role as a Protection Paladin with pride, for you are the shield that safeguards your party․ Your dedication to mastering stats, rotations, and cooldowns makes you indispensable․ Continuous improvement and learning from each encounter will only strengthen your resolve․ Remember, every challenge overcome is a testament to your skill and unwavering dedication․ Lead the charge with confidence and inspire your team to victory!

Additional Resources

For further mastery, explore dedicated websites and forums like Icy Veins and MMO-Champion․ Watch YouTube guides from experienced players to enhance your Prot Paladin skills․

14․1․ Recommended Websites and Forums

Visit Icy Veins and MMO-Champion for comprehensive guides, class updates, and strategies․ Engage with the official Blizzard forums and Prot Paladin communities for expert advice․ These resources provide in-depth insights, gearing tips, and raid strategies to enhance your tanking performance in World of Warcraft: Cataclysm․

14․2․ Videos and Guides for Further Learning

YouTube channels like TankSpot and WoWGuidePaladin offer in-depth tutorials and strategies․ Twitch streams by experienced players provide live insights into raid dynamics․ Websites like WoWpedia and Tankadin host detailed guides on rotations, cooldown management, and gearing․ These resources are invaluable for improving your tanking skills and mastering the complexities of World of Warcraft: Cataclysm․

merlin home transmitter instructions

The Merlin Home Transmitter is a remote monitoring system for cardiac devices, designed to automatically collect and transmit data to healthcare providers for timely patient care․

1․1 Overview of the Merlin Home Transmitter System

The Merlin Home Transmitter System is a remote monitoring solution designed to track implanted cardiac devices like pacemakers and ICDs․ It automatically collects and transmits vital data to healthcare providers, enabling timely interventions․ The system operates via a transmitter placed near the patient, connecting through landline, cellular, or Wi-Fi․ It supports unscheduled checks and manual transmissions, ensuring comprehensive monitoring․ The system is user-friendly, with clear indicators and guides for setup and use, ensuring patient safety and seamless communication with medical teams․

1․2 Importance of Remote Monitoring for Cardiac Devices

Remote monitoring of cardiac devices is crucial for early detection of potential issues, enabling timely medical interventions․ It reduces the need for frequent in-person visits, enhancing patient convenience and safety․ The Merlin Home Transmitter plays a vital role by continuously tracking device performance, detecting heart events, and sending alerts to healthcare providers․ This proactive approach improves patient outcomes, reduces hospitalizations, and ensures optimal device functionality, making it an essential tool in modern cardiac care management․

Key Features of the Merlin Home Transmitter

The Merlin Home Transmitter offers automatic daily device checks, manual transmission options, and compatibility with various connection methods, ensuring seamless remote monitoring of cardiac devices․

2․1 Automatic Daily Device Checks

The Merlin Home Transmitter performs automatic daily checks on your implanted cardiac device, monitoring for critical heart events and silently transmitting data to a secure server for clinician review․ This feature ensures continuous oversight without user intervention, providing peace of mind and enabling early detection of potential issues․ The transmitter operates according to a schedule set by your clinic, ensuring consistent and reliable monitoring․

2․2 Manual Transmission Options

The Merlin Home Transmitter allows for manual data transmissions, enabling users to send updates on demand․ By pressing the Start button, the device initiates a manual check, indicated by a beep and the illumination of the Stars icon․ This feature is particularly useful for unscheduled checks or when automatic monitoring misses an event․ Manual transmissions ensure that critical data is sent to the clinic promptly, providing an additional layer of control and reassurance for patients managing their cardiac devices․

2․4 Compatibility with Various Connection Methods

The Merlin Home Transmitter supports multiple connection methods, including direct analog landlines, cellular adapters, and wireless broadband kits․ While designed primarily for analog phone lines, it can also function with VOIP and cable services․ For wireless connectivity, users can employ a Wi-Fi adapter or cellular dongle․ This versatility ensures compatibility with diverse setups, making it adaptable to various home environments․ Refer to the setup guide for specific instructions on configuring your preferred connection method to ensure reliable data transmission․

Technical Specifications of the Merlin Home Transmitter

The Merlin Home Transmitter is Class II medical equipment, compliant with IEC60601-1:2012 and UL60601-1:2003 standards, ensuring safety and reliability in remote cardiac monitoring․

3․1 Compliance with Medical Standards

The Merlin Home Transmitter meets rigorous medical standards, including IEC60601-1:2012 and UL60601-1:2003, ensuring safety and performance․ Compliance with these standards guarantees reliability in remote monitoring․

3․2 Electromagnetic Interference Precautions

To prevent electromagnetic interference, maintain a minimum distance from portable and mobile RF devices․ The Merlin Home Transmitter may cause radio interference or disrupt nearby equipment․ Ensure proper placement away from other electronic devices to avoid signal disruption․ Following these precautions ensures reliable performance and accurate data transmission․

3․3 Power Supply and Indicators

Plug the Merlin Home Transmitter’s power supply into a wall outlet․ The green power light will illuminate, confirming it is operational․ Keep the transmitter plugged in for continuous monitoring․ Progress lights indicate data transmission status, with all five lit signaling completion․ Beeping sounds alert users to issues or the need for action, such as pressing the Start button to stop flashing lights and sounds․ Always maintain the power connection for uninterrupted device monitoring and data transmission accuracy․

Setting Up the Merlin Home Transmitter

Place the Merlin Home Transmitter on a table or nightstand within 6 feet of your bed․ Choose your connection method (telephone, cellular, or wireless broadband)․ Plug the power supply into a wall outlet; the green light will confirm it is operational․ Follow the setup guide for detailed instructions on connecting and configuring your transmitter for optimal performance and remote monitoring capabilities․

4․1 Placement and Positioning Guidelines

The Merlin Home Transmitter should be placed on a stable surface, such as a table or nightstand, within 10 feet of your bed to ensure optimal signal strength․ Position the transmitter facing the area where you sleep to maintain clear communication with your implanted device․ Avoid placing it near sources of electromagnetic interference, like microwaves or cordless phones, and keep it away from direct sunlight to prevent overheating․ Proper placement ensures accurate data transmission and reliable remote monitoring of your cardiac device․

4․2 Connecting to Power Supply

To ensure uninterrupted operation, plug the Merlin Home Transmitter into a nearby electrical outlet using the provided power supply․ The green power light will illuminate, confirming the transmitter is powered on․ Keep the transmitter plugged in at all times to maintain continuous monitoring․ Avoid using extension cords or shared outlets to prevent potential disruptions․ Ensure the power cord is securely connected to both the transmitter and the wall outlet for reliable operation․ This step is critical for maintaining consistent remote monitoring of your cardiac device․

4․3 Choosing the Connection Method

Choose a connection method based on your setup: direct analog landline, cellular adapter, or wireless broadband kit (Wi-Fi)․ For a direct connection, ensure your telephone uses touch-tone dialing and has an RJ-11 plug․ The transmitter is designed for analog lines but may work with VOIP or cable services․ For cellular or Wi-Fi, use the appropriate adapter or kit․ Place the transmitter within 10 feet of your bed for optimal signal strength․ Follow the specific instructions for your chosen method in the provided setup guide to ensure proper installation and functionality․

Operating the Merlin Home Transmitter

Operate the Merlin Home Transmitter by initiating manual transmissions, understanding progress lights, and monitoring device status and battery life for seamless remote cardiac monitoring․

5․1 Initiating Manual Transmissions

To initiate a manual transmission, press the Start button once․ The Stars icon will light up, and you will hear a beep after 1 second․ Ensure you remain in front of the transmitter during this process; If the transmission is successful, the progress lights will indicate completion․ For further assistance, refer to the Quick Start Guide or contact technical support at 1-877-696-3754․ Always follow the instructions provided in the manual for accurate results․

5․2 Understanding Progress Lights and Beeping Sounds

The Merlin Home Transmitter uses progress lights and beeping sounds to indicate status and issues․ During manual transmission, the progress lights flash sequentially․ If all five lights illuminate, it signals a need to contact technical support․ Beeping sounds accompany successful transmissions or issues․ A single beep confirms the process is complete, while continuous beeps may indicate errors․ Refer to the manual for detailed interpretations of light patterns and sounds․ For assistance, call the support hotline at 1-877-696-3754 or consult the Quick Start Guide․

5․4 Monitoring Device Status and Battery Life

The Merlin Home Transmitter automatically monitors your implanted cardiac device daily, ensuring timely detection of important heart events․ The system provides updates on device settings and battery status, with low battery alerts sent directly to your clinic․ Users can check battery life through the transmitter’s indicators or associated systems․ Regular monitoring ensures optimal device performance and prevents unexpected interruptions․ If a low battery notification is received, contact your clinic promptly for further instructions or potential replacement, maintaining uninterrupted remote monitoring and patient care․

Troubleshooting Common Issues

Identify and resolve connection problems, error lights, or alarms․ Check connections, restart the transmitter, or contact technical support if issues persist or all progress lights illuminate․

6․1 Resolving Connection Problems

To address connection issues with the Merlin Home Transmitter, first ensure the telephone line is analog and touch-tone compatible․ Verify all cords are securely plugged into the correct ports․ If using a cellular adapter or wireless broadband kit, check for proper pairing and signal strength․ Restart the transmitter and test the connection again․ If problems persist, consult the user manual or contact technical support for assistance․ Always maintain a stable power supply to prevent disconnections during data transmission․

6․2 Addressing Error Lights and Alarms

If the Merlin Home Transmitter displays error lights or emits alarms, first press the Start button to stop the flashing lights and beeping sounds․ If all five progress lights are lit, this indicates a critical issue, and you should immediately contact Technical Support․ For other error lights, ensure the transmitter is properly connected to power and the chosen communication method (telephone, cellular, or Wi-Fi)․ If issues persist, refer to the user manual or contact your clinic for further guidance․ Regular checks can help prevent such problems․

6․3 When to Contact Technical Support

Contact Technical Support if you encounter unresolved issues, such as persistent error lights or alarms, or if the transmitter fails to establish a connection despite troubleshooting․ If all five progress lights are lit, this indicates a critical issue requiring immediate assistance․ Additionally, reach out if you suspect hardware damage or experience recurring problems․ For assistance, refer to the user manual or call the dedicated support line provided by St․ Jude Medical․

Safety Precautions and Maintenance

Prevent electromagnetic interference by maintaining distance from RF devices․ Clean the transmitter gently with a dry cloth and avoid harsh chemicals․ Schedule regular check-ups for optimal function․

7․1 Preventing Electromagnetic Interference

To prevent electromagnetic interference, maintain a minimum distance between the Merlin Home Transmitter and portable or mobile RF devices․ The distance depends on the communication equipment’s maximum output power, as specified in the user manual․ Ensure the transmitter is not placed near devices like cordless phones, microwaves, or Wi-Fi routers․ This helps maintain data accuracy and ensures reliable operation․ Always follow the guidelines provided in the manual to minimize interference risks and ensure optimal performance of the transmitter․

7;2 Cleaning and Handling the Transmitter

Regular cleaning and proper handling of the Merlin Home Transmitter are essential for maintaining its functionality and longevity․ Use a soft, dry cloth to wipe the exterior, avoiding harsh chemicals or abrasive materials that could damage the surface․ Keep the transmitter away from moisture to prevent electrical issues․ Handle it gently to avoid drops and store it on a stable surface․ For detailed cleaning instructions, refer to the user manual․ Proper care ensures optimal performance and durability of the device․

7․3 Regular Check-Ups for Optimal Function

Regular check-ups are crucial for ensuring the Merlin Home Transmitter operates efficiently․ Schedule routine inspections with your healthcare provider to verify proper functionality and address any potential issues․ Additionally, perform self-checks by monitoring the power light and ensuring all connections are secure․ Keep the transmitter updated with the latest software provided by the manufacturer․ Regular maintenance helps prevent technical failures and ensures continuous monitoring of your cardiac device, providing peace of mind and reliable health care support․

User Resources and Support

Users can access a Quick Start Guide, detailed manuals, and technical support for assistance․ Contact St․ Jude Medical or your clinic for further help and guidance․

8․1 Quick Start Guide and Detailed Manuals

The Merlinhome Transmitter Model EX1150 comes with a Quick Start Guide and detailed manuals, providing step-by-step instructions for setup, operation, and troubleshooting․ These resources explain how to connect the transmitter using telephone lines, cellular adapters, or wireless broadband kits․ The guides also cover manual transmission processes, understanding progress lights, and resolving common issues․ They are designed to help users navigate the system confidently and ensure optimal functionality․ These manuals are included with the transmitter for easy access and reference․

8․2 Contacting Technical Support and Clinics

For assistance with the Merlinhome Transmitter, users can contact St․ Jude Medical’s technical support at 1-877-696-3754, available Monday through Friday from 8AM to 8PM Eastern Time․ Patients are also encouraged to reach out to their clinics for personalized guidance and further instructions․ The support team is equipped to address setup issues, troubleshooting, and general inquiries, ensuring users receive the help they need for optimal transmitter operation and maintenance․ This resource is crucial for resolving any challenges quickly and effectively․